I use the phrase “Trust the Pattern” so often in the advice I give when people ask questions about following Crafty Intentions patterns, that it has become a slogan of sorts. In honor of this mantra, I did the work to turn it into a beautiful design for hookers everywhere!!
Go here to purchase your own tote bag that you, too, can fill with WIPs and Chains (stitches)!!
And say it with me…
Pony Pattern!
The Last published pattern of 2018 was the Pony Pattern! Using it, you can make a Pony (Horse), a Pegasus (Horse with Wings), or an Alicorn (Horse with Wings and a Horn)! Also features minimal sewing!
You can find it here: https://www.ravelry.com/patterns/library/pony-pegasus-unicorn-alicorn
Or Here: https://www.etsy.com/listing/650091086/pony-crochet-amigurumi-digital-pattern
© 2019 Megan Lapp, Crafty Intentions™. All rights reserved. This pattern is FOR PERSONAL USE ONLY. The pattern (or parts of it) may not be reproduced, distributed or resold, translated, published, altered, shared or posted (for sale or free) over the internet or offline. You can sell items made from this pattern, provided they are handmade by yourself in a limited number and you give credit to the designer. Please add the following lines to your item description and any item you are selling: “This item is handmade by (your name) from a design and pattern by Megan Lapp, Crafty Intentions™”.
Crafty Seamstress Intentions: Butterfly Wings
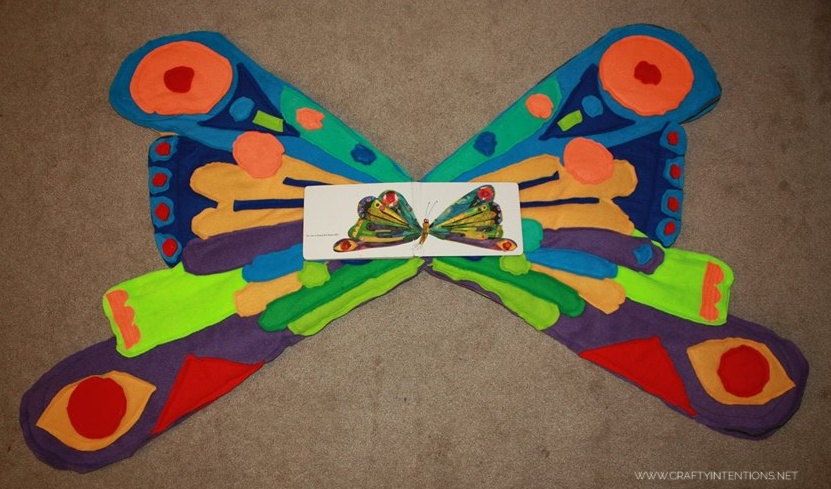
I've made butterfly wings several times. I love the idea of easy-to-use, not-easy-to-outgrow, dress-up clothes for kids. Butterfly wings are perfect. If they slip on to arms, and have loops of elastic for wrists or fingers, they are all of those things I mentioned above. Today you can find cheapy light weight Butterfly wing scarves on places like Amazon and Ebay. If you add a couple of Pacifier clips to the neckline of the scarf, you can clip it to a kids shirt and then you'll have your own happy butterfly. Or you can try to do it the hard way. I needed to do it the hard way for my son's Halloween costume one year. He was so into the Very Hungry Caterpillar, and I knew he'd love running around screaming that he was a VERY BEAUTIFUL BUTTERFLY, but I also knew I'd have to make it basically identical to the book to be appealing to him.
This was a lengthy process of cutting up two pairs of every piece of fleece, sewing it to a middle-felt & batting sandwich, and making sure that everything colorful was exactly repeated on each front and back of each left and right wing. It came out looking great, I think. But at the same time, it's like a heavy blanket. Using pacifier clips to clip it to his arms didn't pan out, because it was just too heavy. I ended up sewing it directly to a cheap orange sweatshirt, and I'm a little sad about that because I am very pro-reusability. But, it was the only way to fully support the weight of these wings! If I had to do it again, I don't have a better idea of how to get it done. Maybe paint a sheet instead? Hmm. But he was thrilled.
I had these grand visions (Before making these wings) of making beautiful piecey handmade butterfly wings that you clip onto a child for INSTANT magic. But... Like I said, it turned out to be a lengthy process. I tried it again using lighter weight fabric (Not fleece) on Felt, sandwiched between felt cut out to showcase the fabric underneath. And I glued the blue fabric in place using fabric glue. However, it ended up feeling like WAY too much glue, gobs and gobs and buckets of glue. And then I lined it up with a piece of felt and cut out felt windows to showcase the blue fabric beneath... but this was tedious and difficult. I ended up overstitching the top and bottom felt pieces into place (It looks the same from both sides of the wings, so it was 3 layers of felt total, 2 layers of glued blue shiny fabric).
It turned out decently well, but way too much work and time to be able to make something like this in bulk -- so this is the last version I made!
It was still a hit!
Affordable Wall Art: Thrift Store Altered Landscape
Do you want to add some whimsical wall art to a room using minimal crafty energy for very little money?? Awesome:
1. Go to local thrift store
2. Find a dowdy boring landscape
3. Paint in (or print out/cut out/modge podge on) some [Insert cool thing here]
4. Profit?
The "Cool Thing" could be space ships, robots, dinosaurs, black holes, Godzilla, the Emerald City, the whomping willow, a Death Star, Unicorns, etc.
Or Wild Things waving to Max.
For extra credit, paint the sky with glow in the dark stars/galaxy.
Featured Pattern: Mickey Mouse Baby Hat
[Free] Pattern by Olivia Kent
(Not a Crafty Intentions Pattern)
Available here: https://www.ravelry.com/patterns/library/mickey-mouse-inspired-baby-hat
This was easy to make, and certainly a crowd pleaser at a Disney-Enthusiast's Baby Shower. I would certainly recommend this pattern!
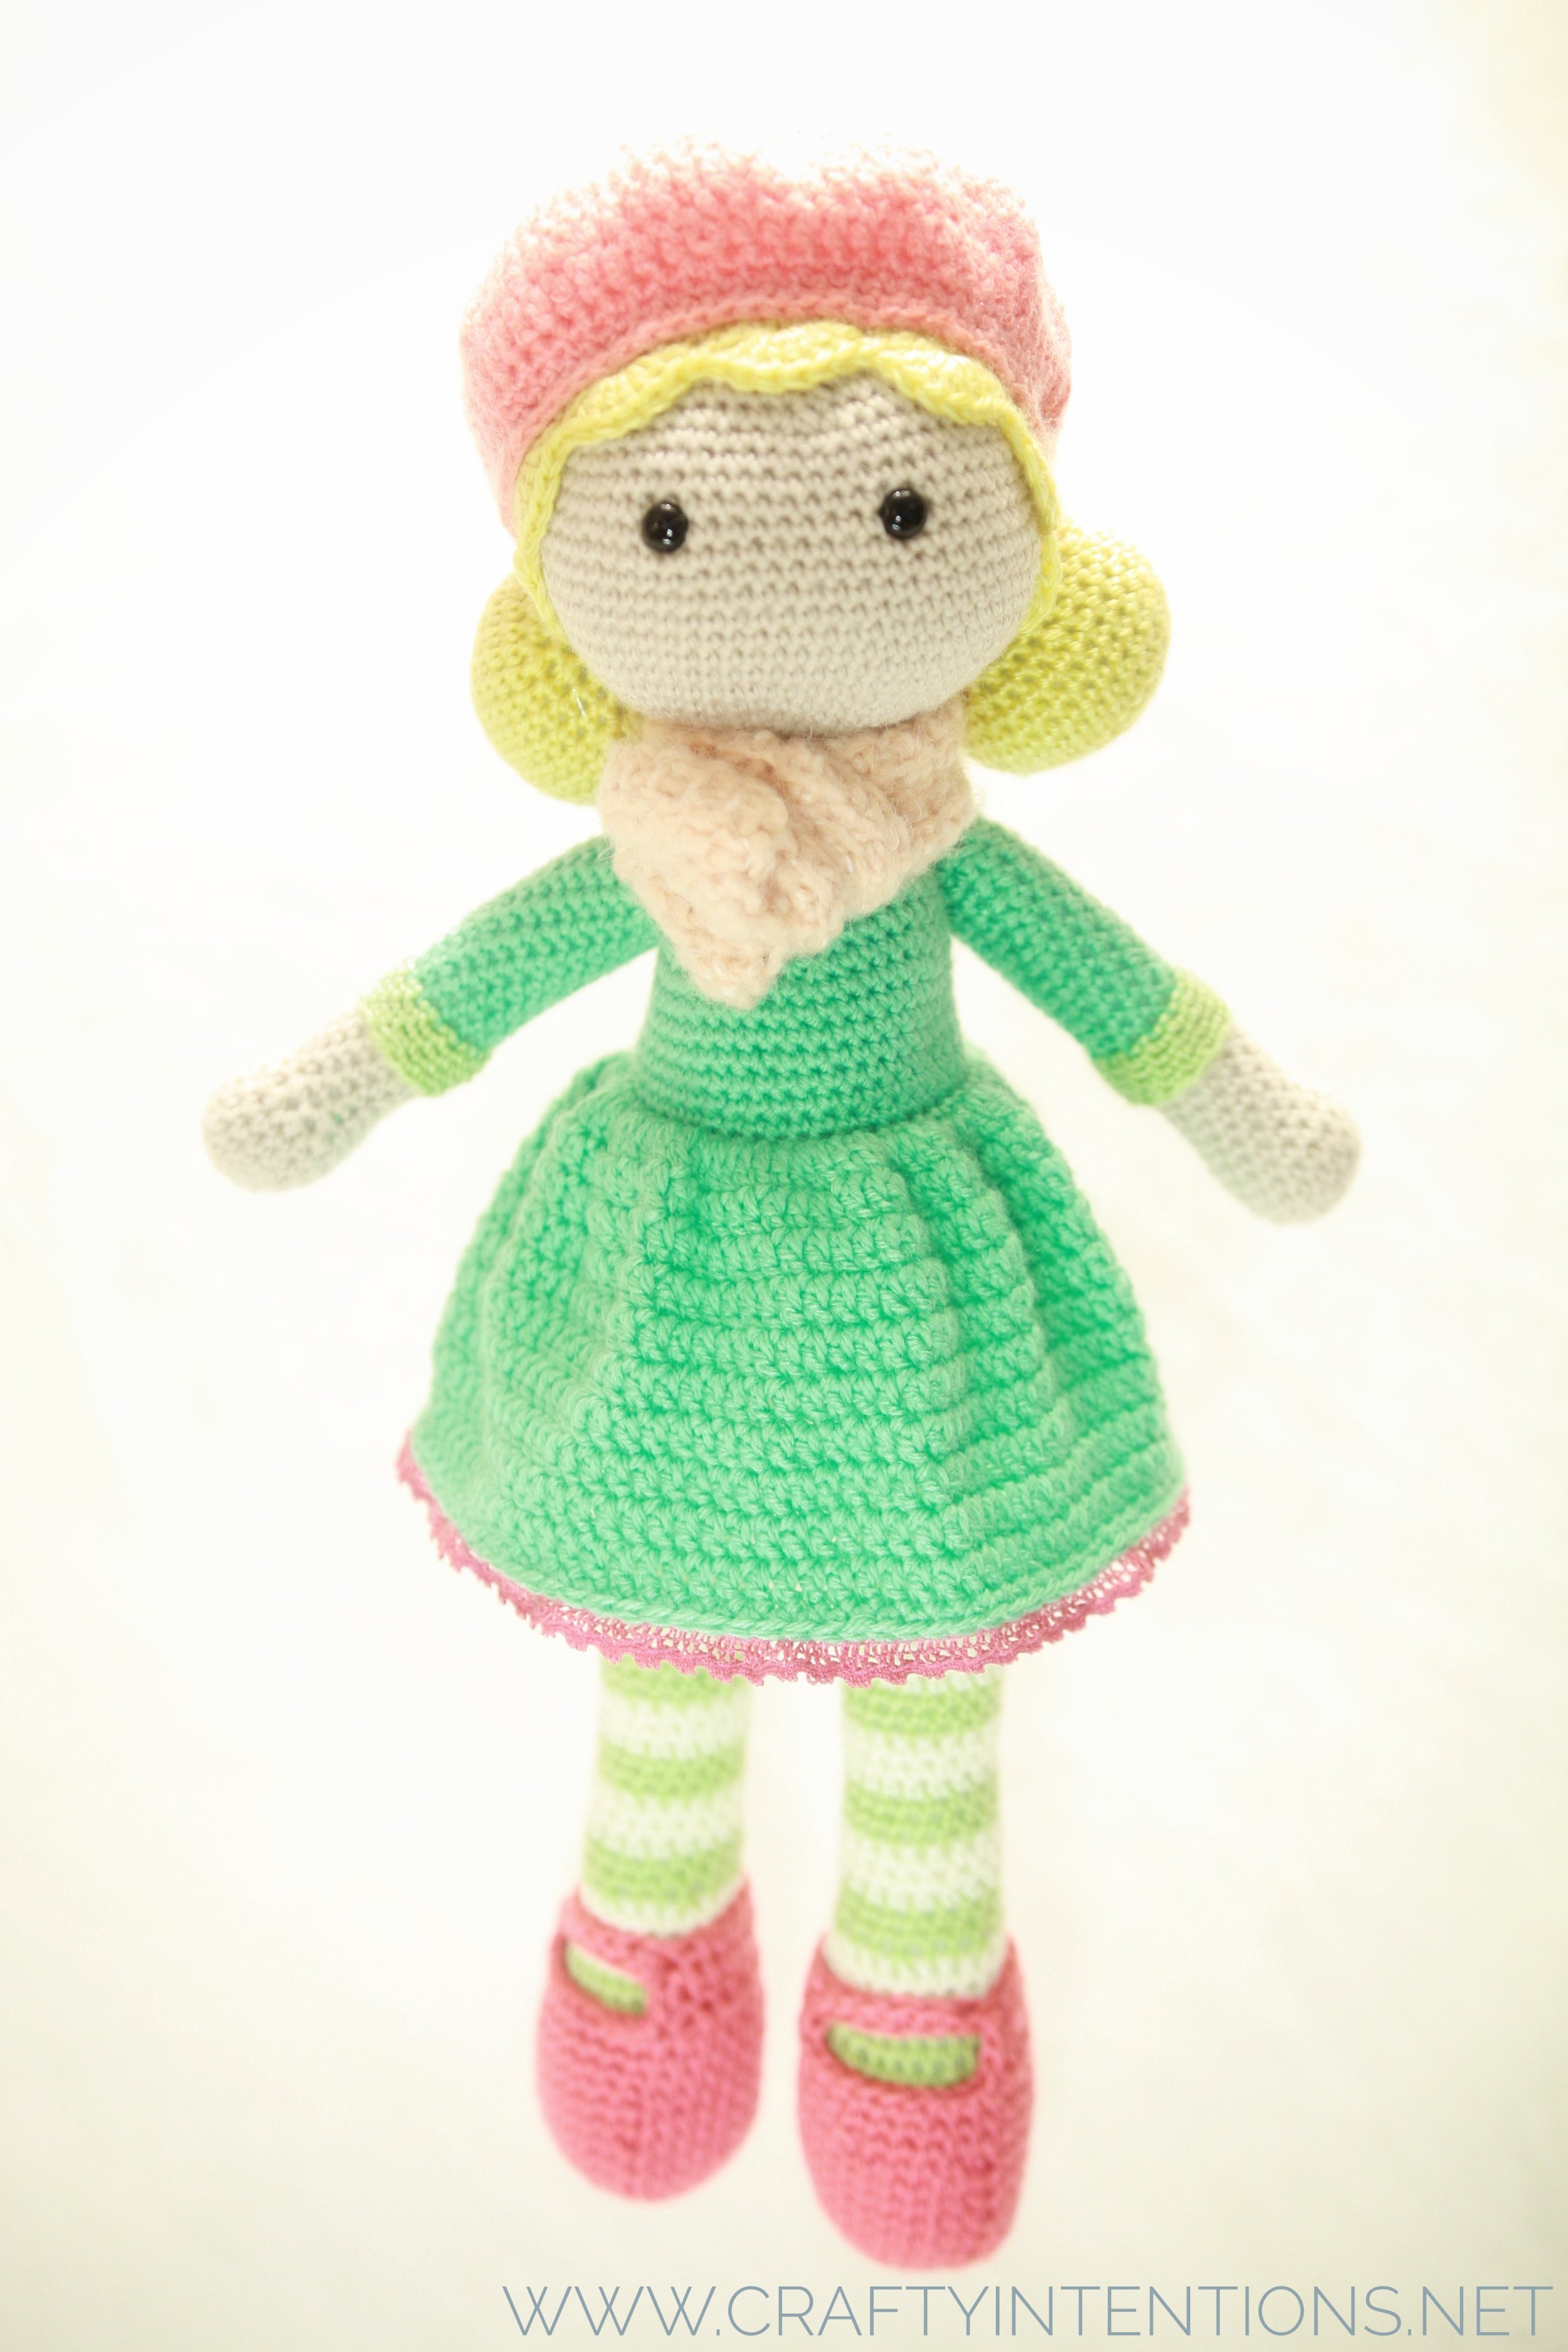
Featured Pattern: Girl Dolls in Berets
Pattern by Desislava Dimitrova
(Not a Crafty Intentions Pattern)
Available Here: https://www.ravelry.com/patterns/library/aria-crochet-doll
This makes a larger doll than I expected, but it was fun to be able to make all the different bits in different coordinating colors. I chose to sew trim to the bottom of the inside of the skirt. I also sewed on all the accessories to make sure that they are secure as a toy for a small child. I would certainly recommend this pattern!
Merry Christmas! Happy Holidays!
Be safe, be loved.
Holiday Gift Idea!
My nephew made this drawing in 2008. He drew a family portrait with his parents and his brother, and there's even a squiggle on his mom's belly which is meant to be his soon-to-be brother. I took the drawing, scanned it into the computer, printed it on fabric, and then I embroidered it by hand. I framed it as a gift for them. It took a bit of time, but I'm proud of the results, and when you're on a budget this is an excellent option!
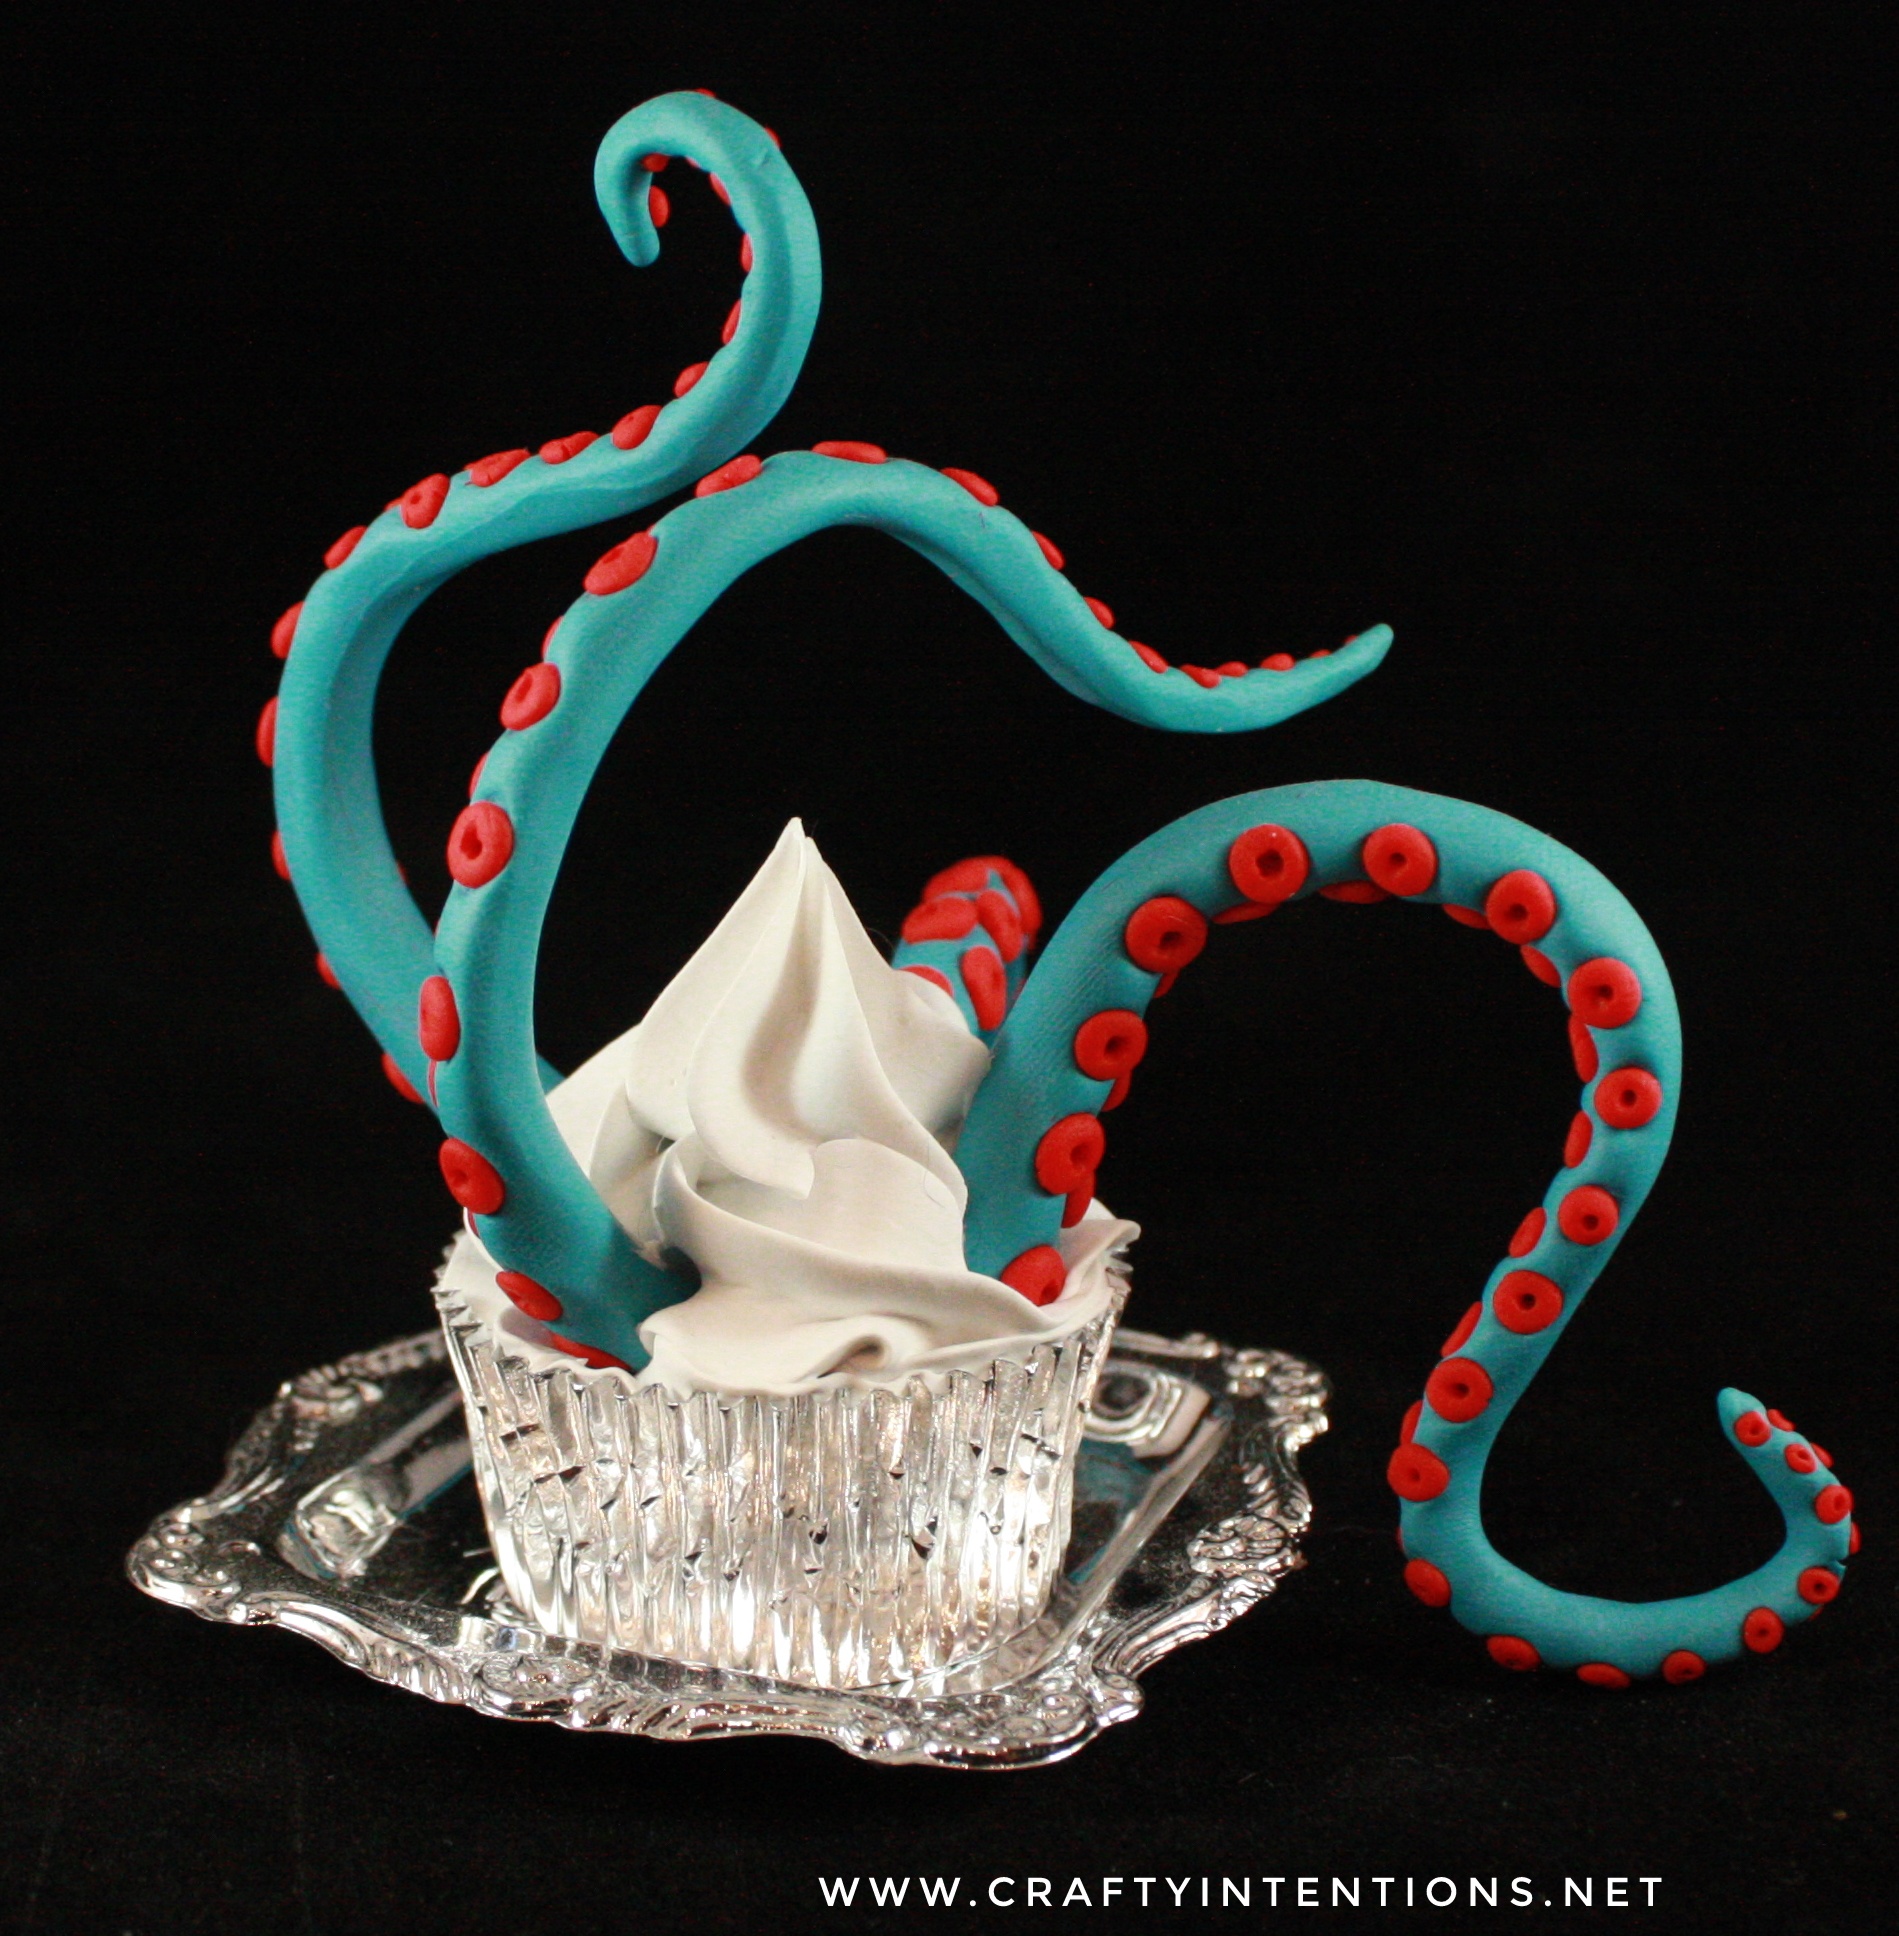
Crafty Intentions: Failed Results, Part 5: Tentacle Cupcakes
Why?
Why is a good question. I don't know why.
All I can say is that at the time, it made sense. Now? Hmm.
Crafty Intentions Quilt Edition: Pillows
When I was learning to quilt, one of the things that I became obsessed with was quilting 10 pillow shams for each season of the year. I ended up only making about 30 of them - 10 for spring/summer, 10 for Fall, and 10 for Christmas/winter. These are my Christmas winter ones. What was fun was that they are so small that piecing them was not overwhelming, quilting them was an experiment and I could get creative with it. They are envelope shams, so they come off pretty easily and we wash them after the 4 months or so they're on the pillows. They look so festive, and I never get tired of them because we change them out with the seasons!
10/10 would highly recommend this project!
Featured Pattern: Seahorse
Seahorse made by Me! Crafty Intentions
Pattern by Terry Finer.
Available Here: https://www.ravelry.com/patterns/library/post-modern-post-stitch-seahorse
This pattern builds this seahorse in an ingenious 3-dimensional way so that you do not need stuffing. It is built in such a way that it fills itself out! It's amazing! I made a ton of them and it was tremendous fun. It was certainly a challenging pattern, I would say intermediate or above. But I would definitely recommend it!
Free Crafty Intentions Hungry Caterpillar Pattern
Have your child (or classroom!) tell the story of The Very Hungry Caterpillar by feeding the Caterpillar the correct food as you read the story! Kids will be able to practice all kinds of skills like color recognition, counting, gross and fine motor skills. The best part is that you clean up the toy as you play with it!! This pattern is 10 pages long and contains a full set of instructions with photographic illustrations, and specific links to every other FREE pattern you will need to put together a full set of every piece of food in Eric Carle's "The Very Hungry Caterpillar"!!
Available here on Ravelry: https://www.ravelry.com/patterns/library/hungry-caterpillar-play-set
© 2018 Megan Lapp, Crafty Intentions™. All rights reserved. This pattern is FOR PERSONAL USE ONLY. The pattern (or parts of it) may not be reproduced, distributed or resold, translated, published, altered, shared or posted (for sale or free) over the internet or offline. You can sell items made from this pattern, provided they are handmade by yourself in a limited number and you give credit to the designer. Please add the following lines to your item description and any item you are selling: “This item is handmade by (your name) from a design and pattern by Megan Lapp, Crafty Intentions™”.
Pincushions forever.
There was a time when I became obsessed with making pincushions. Why? Everyone needs a pincushion, right? Wrong. Very few people need pincushions. But I thought that it was a good way to explore making felt-hand-stitched-softies with a purpose.
First there were cacti. I made the pattern myself. It's felt, stuffed with polyfil (with a little bit of steel wool at the end of each cactus branch to keep the pins and needles sharp!). I glued it into the terra cotta pot. Not a great idea, because pots like this break easily. One curious cat later, and you'd find yours shattered on the floor with no ability to fix it. Also, they are a bit large and in charge - I'm not sure anyone needs a pin cushion of this gigantic size. Fail.
For a while I dabbled in snap bracelet pin cushions. I wanted the active seamstress to be able to wear a stylish... Octopus?... on her wrist and stab it as often as she liked. It was a good idea, but in practice it's quite bulky. It takes up too much space, and doesn't stay oriented on the wrist. The snap bracelet itself (that I encased in blue felt above) wasn't quite strong enough, so in the end, it was a fail and a one-off. I did try again with a Rainbow snap bracelet. I made a separate arched felt rainbow that was pulled straight when you wore it as a bracelet, but arched into the air between two clouds at either end of the snap bracelet when it was straight... But it had the same issues. I would show you, but I can't even find a picture!
Cupcakes were my next attempt. This was a better idea than terra cotta pots and cacti, because the silicone cups I used aren't breakable! Win!... Ish! Instead the issues I found were first that the glass beads I used for sprinkles aren't great when you're using it as a pincushion (they get in the way of the pins!, duh. Ugh.), and the glue I used to secure the cupcake into the silicone cup didn't hold.
I started getting warmer with this one! The Ice cream cone I glued into a wooden cone, and that worked great. The Glue held, and the wood was not fragile. Unfortunately, I made the same mistake with the glass beads getting in the way of pins.
This was a small hat I found in a craft shop, that was just begging for a little white rabbit. So I made it look like the rabbit was hiding in the hat and everything was so great! The hat is not breakable, the glue held, and there was no interference for the pins. However, I underestimated how disturbing it would feel to stab pins into the back of a helpless little magic hat rabbit.
Once I entered the world of disturbing, it was hard to turn back though. This one was built on a recycled bottle cap weighted with pennies. The beads get in the way, but it turned out well for what it is. Very few people seem to enjoy it the way I do, unfortunately.
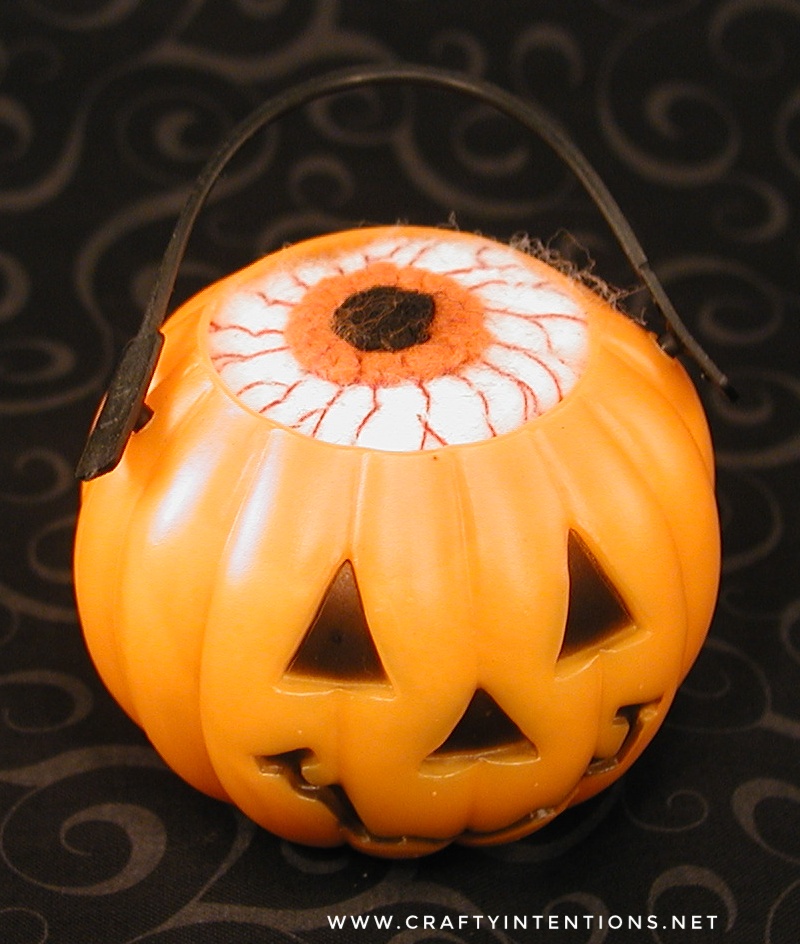
Have you ever seen these cheapy little plastic pumpkins? I'm not sure what they're supposed to be fore, halloween party favors maybe?? But, I decided to try them for pin cushions! MORE EYEBALLS.... Maybe? Hmm, maybe not.
This one might be my favorite. It worked up quickly - a little piece embroidered like a brain. The glue held, the pumpkin isn't fragile...
And then I figured out that I prefer to keep my pins in a box.
Oh well.
Monster Pattern: Explained
This Monster Pattern is available on Ravely: https://www.ravelry.com/patterns/library/choose-your-own-adventure-monster
© 2018 Megan Lapp, Crafty Intentions™. All rights reserved. This pattern is FOR PERSONAL USE ONLY. The pattern (or parts of it) may not be reproduced, distributed or resold, translated, published, altered, shared or posted (for sale or free) over the internet or offline. You can sell items made from this pattern, provided they are handmade by yourself in a limited number and you give credit to the designer. Please add the following lines to your item description and any item you are selling: “This item is handmade by (your name) from a design and pattern by Megan Lapp, Crafty Intentions™”.
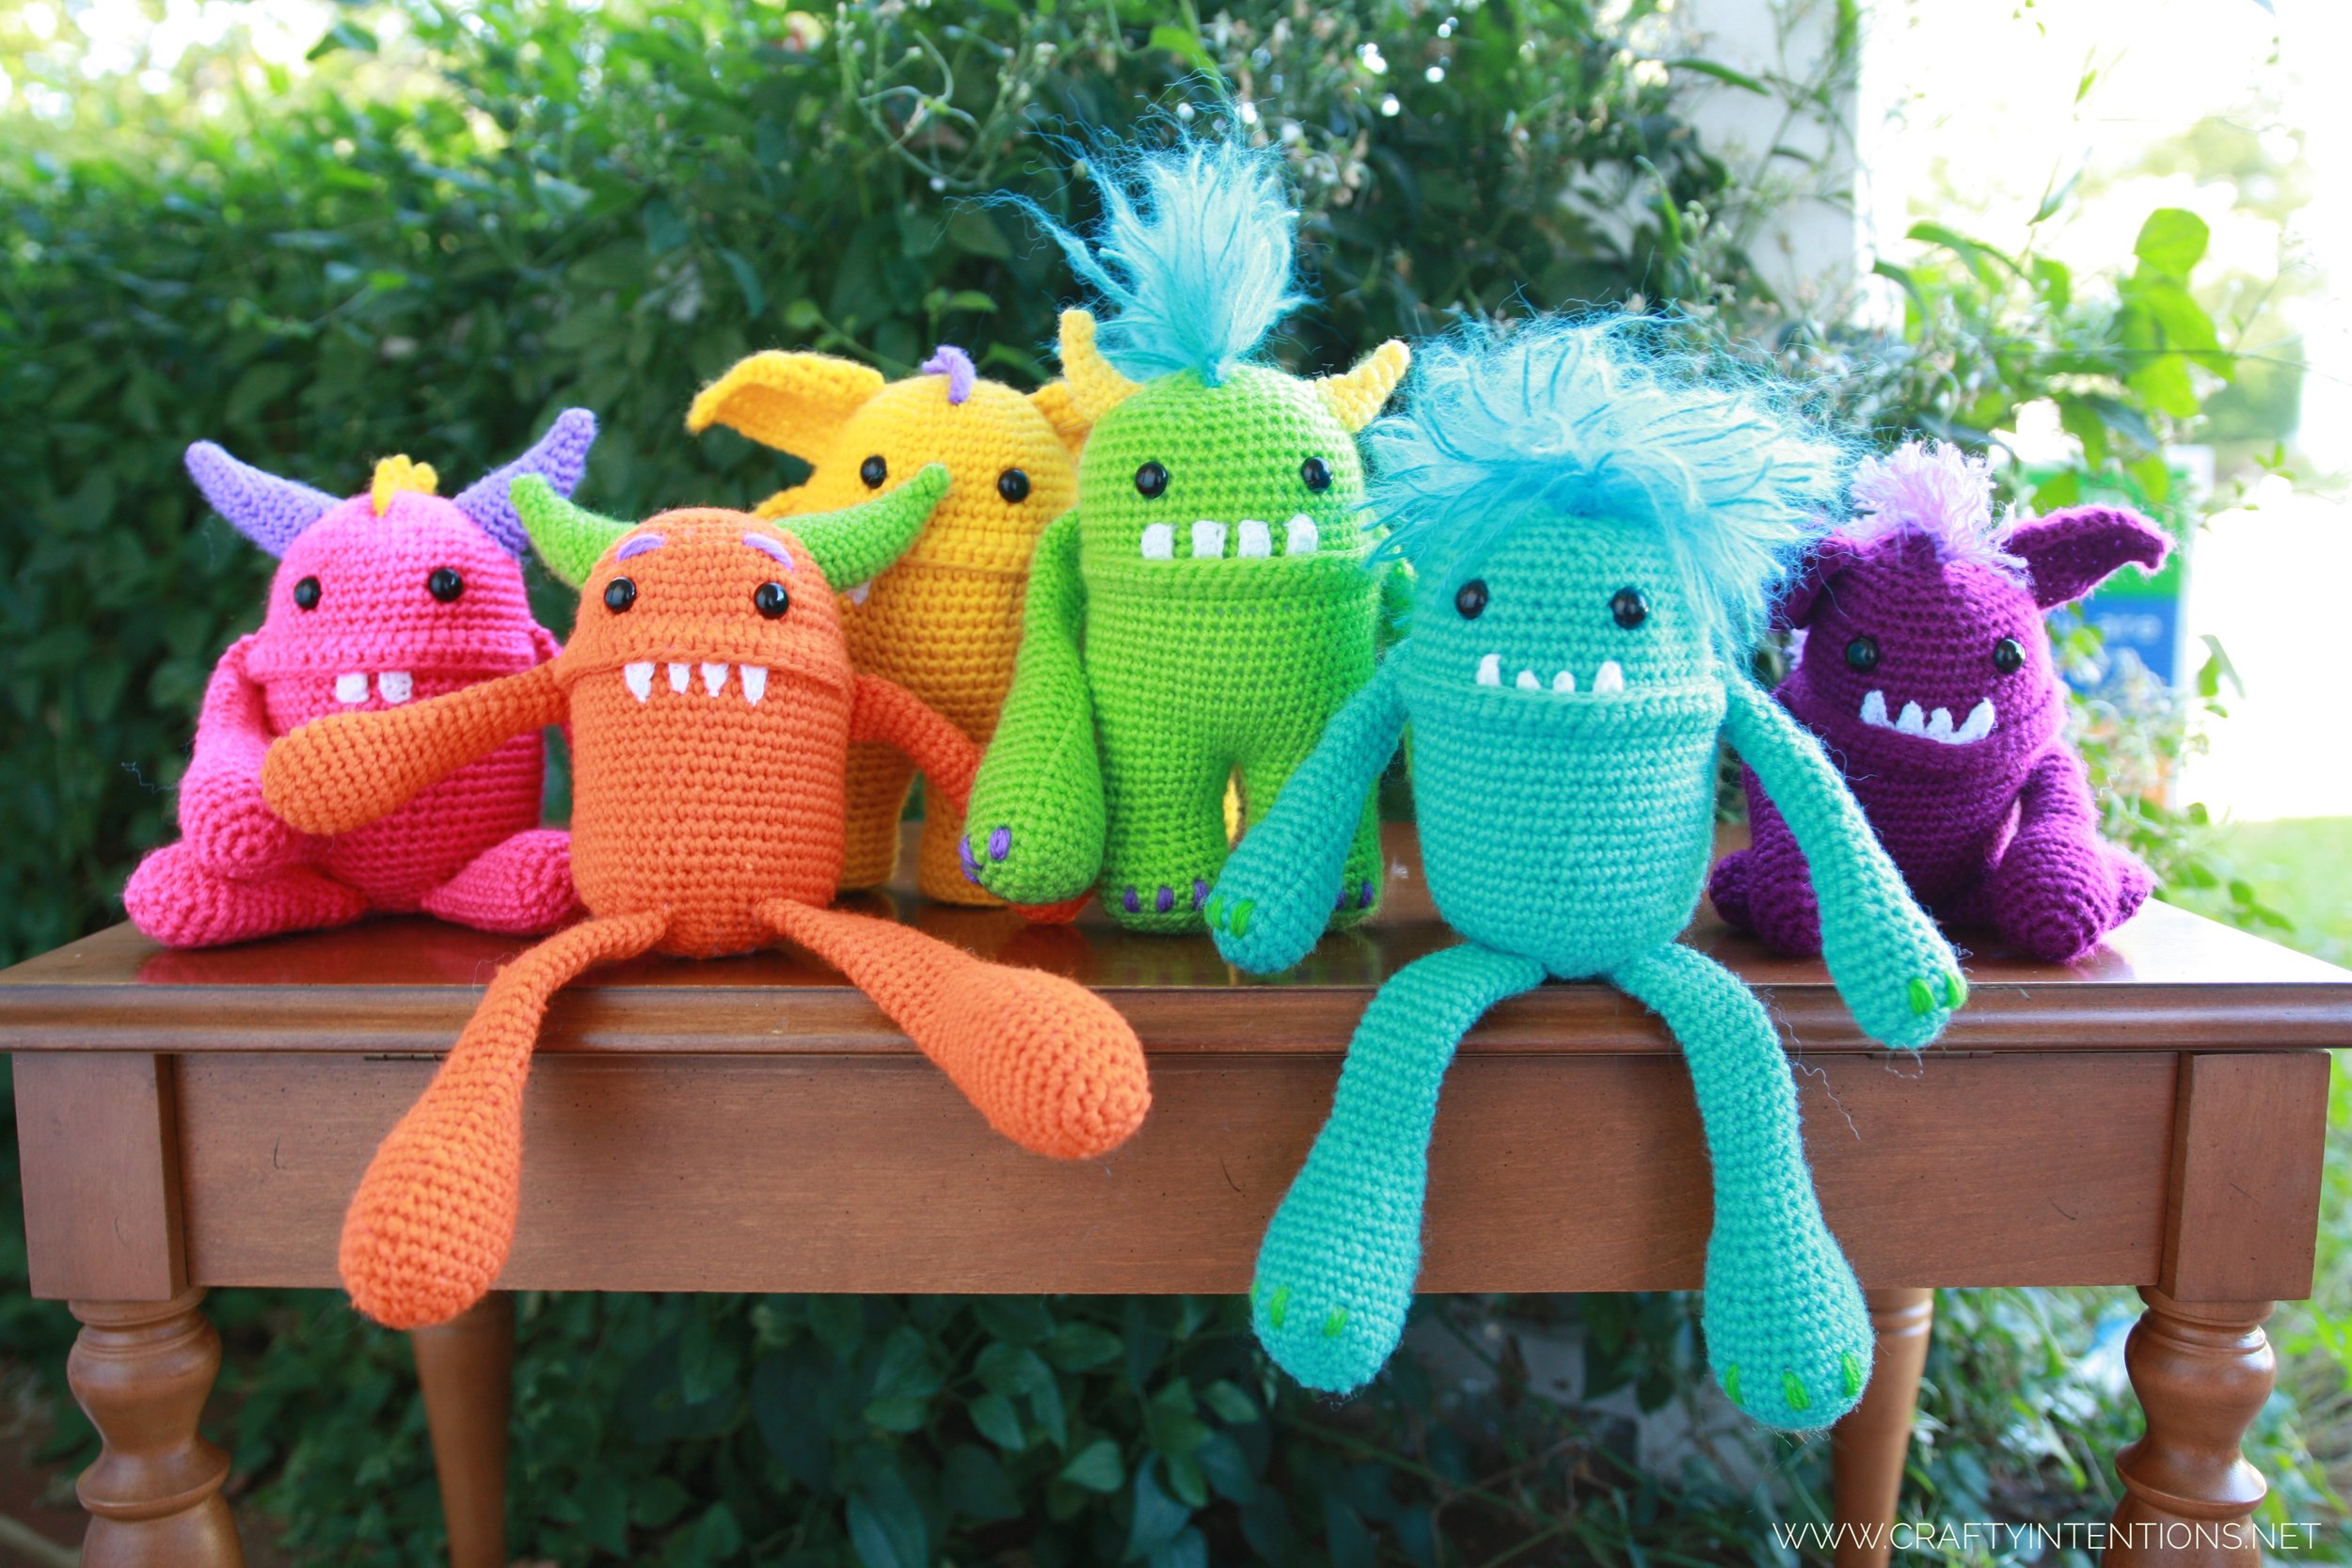
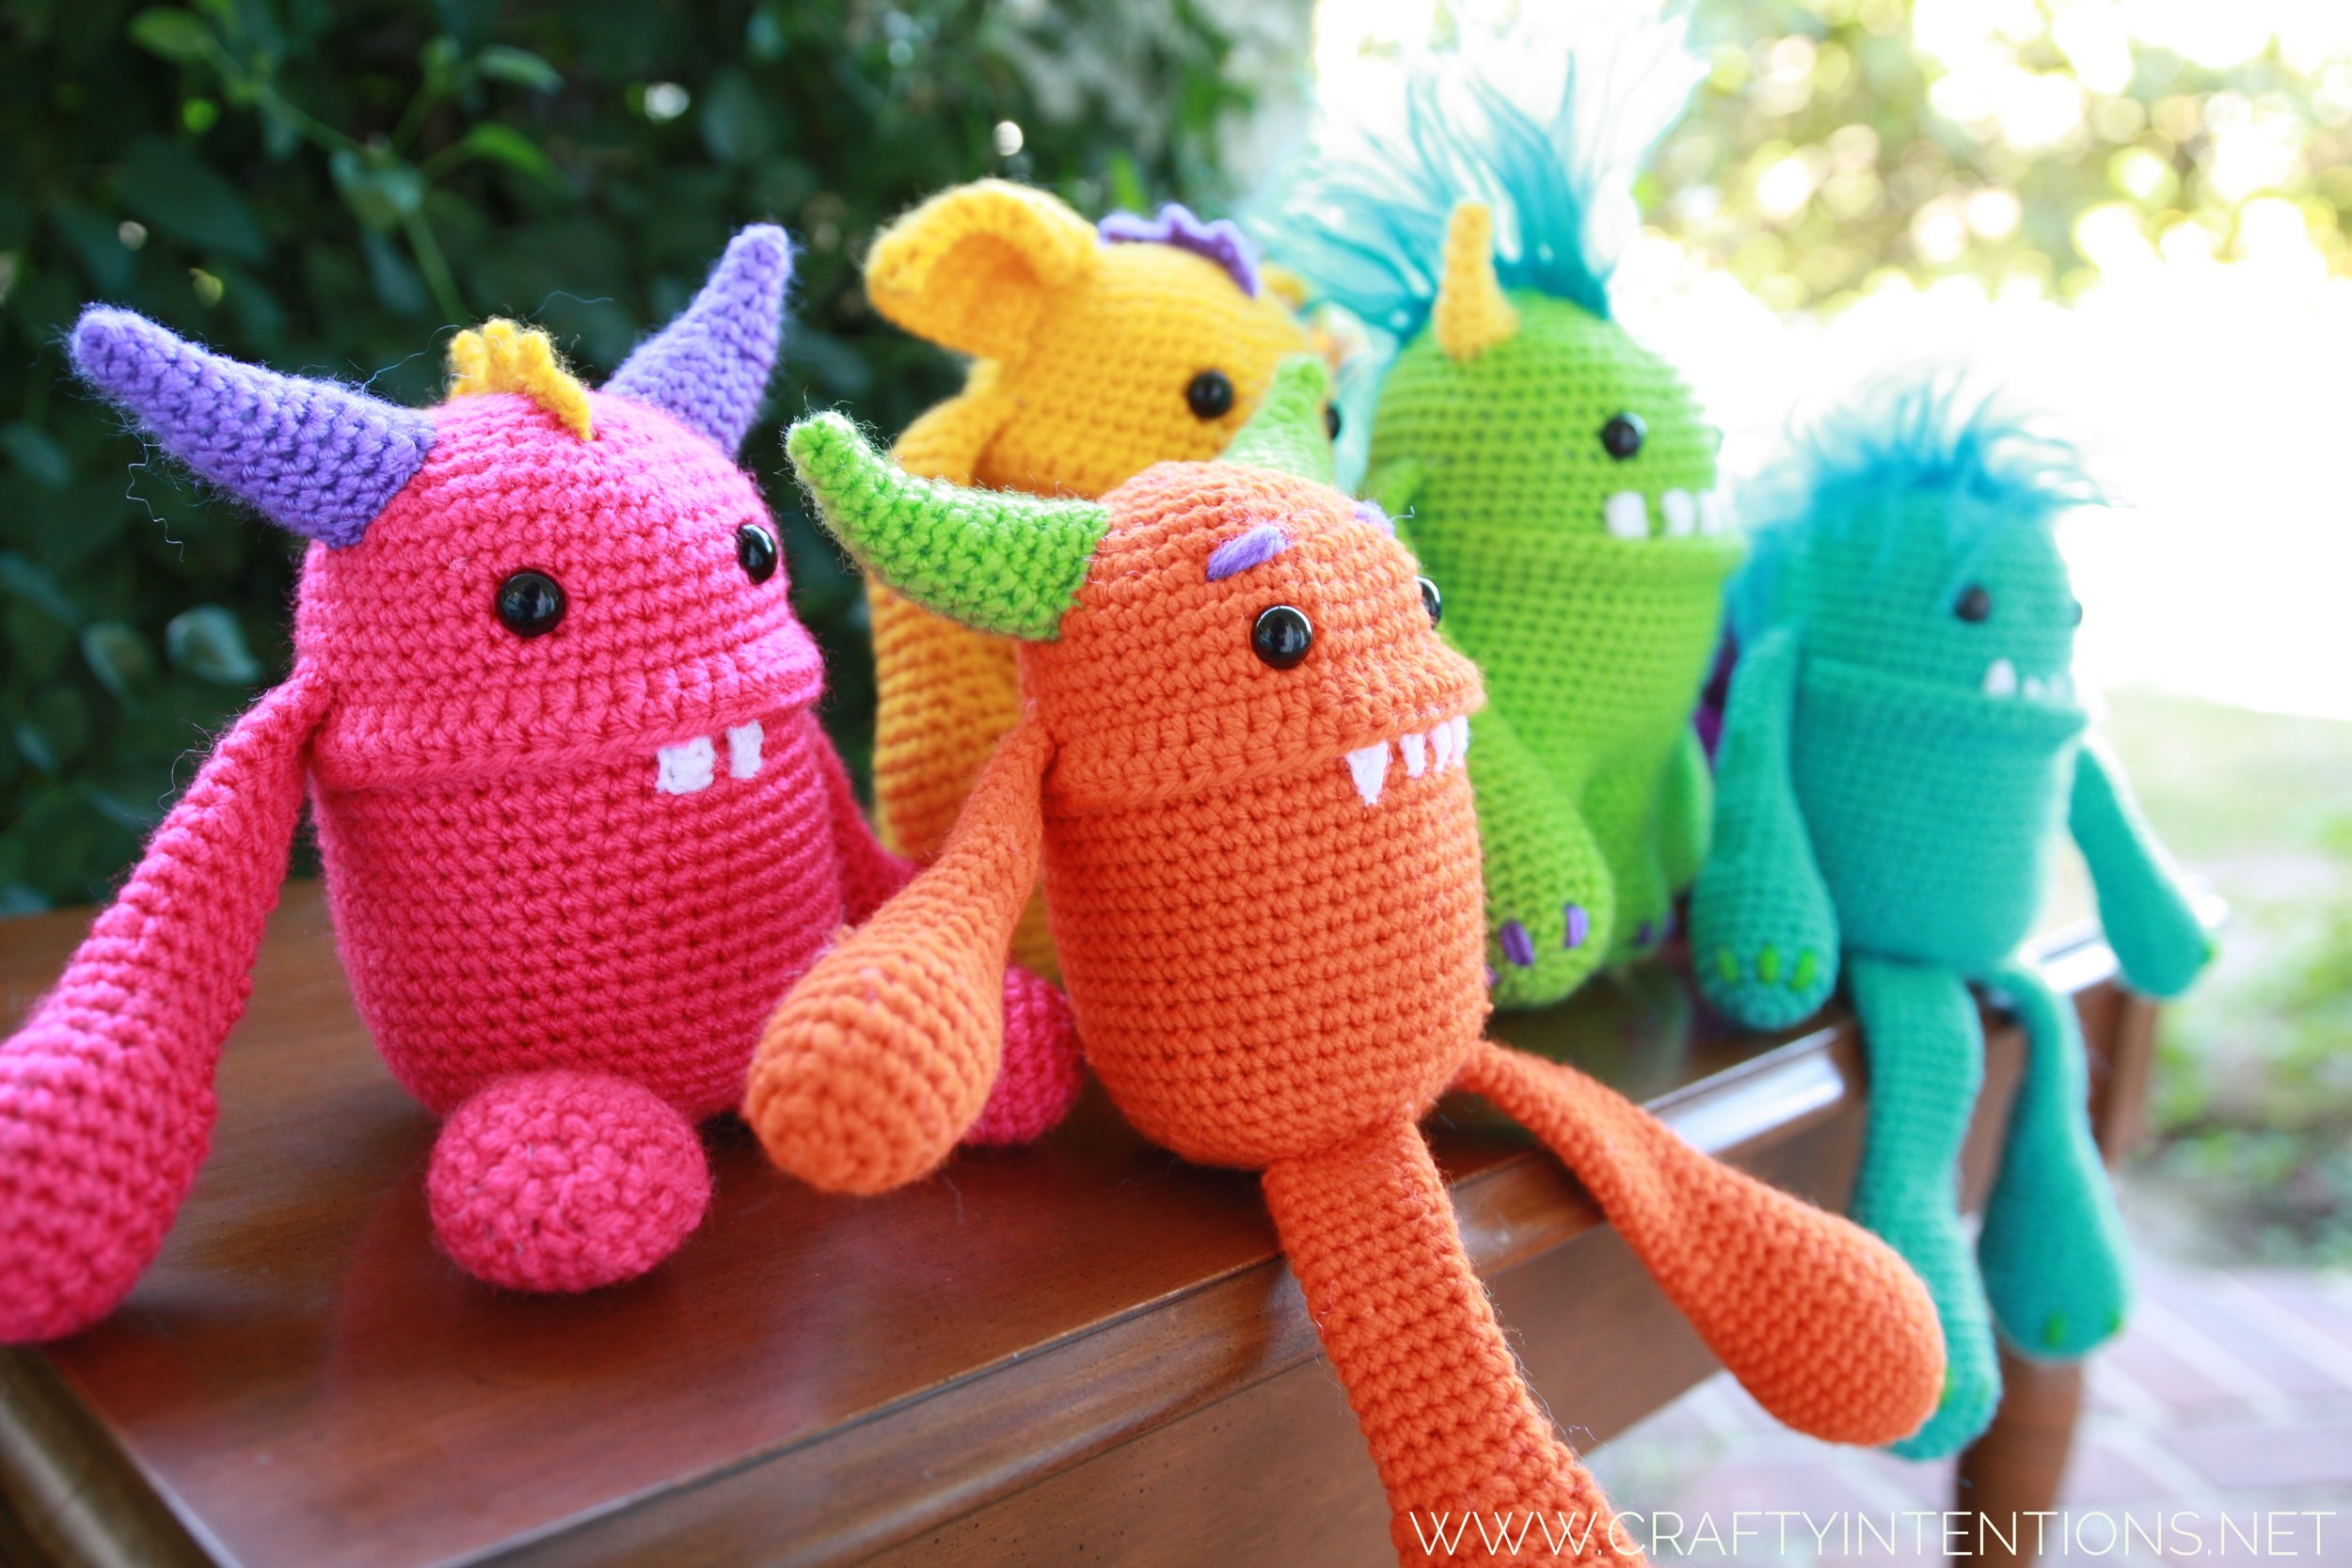
This pattern is for an Amigurumi-Style Choose-Your-Own-Adventure Adorable Monster. These Monsters have many interchangeable or combinable options to create over 64 different end-creations!! You can truly customize exactly what you want to make. There are Monsters with overbites or underbites, Monsters with legs and Monsters without legs, Monsters with dangly feet and Monsters with flat feet, Monsters with long or short arms, Monsters with horns or ears (or both!), Monsters with mohawks or spikes down their back, Monsters with eyebrows and/or claws, Monsters with as many teeth as you want in one of three styles!
Each step is photo-illustrated. Yarn amounts are extremely variable depending on what options you use. This project is an excellent stash buster for all sorts of smaller amounts of yarn you have on hand for all the different contrasting decorative bits you might choose to make.
Confessions in Winging it: Sorting Hat
This is another one where I did the thing, and ideally would like to be able to do it again. So Why? Whyy?? Whyyy did I not write down what I did as I did it??
I think the real reason is that I always believe the first version is going to be terrible, so what's the point of writing it down. And it doesn't always come out great, but it often comes out pretty-good but because of that nagging negative voice, I don't write anything down and then I always curse myself afterwards.
Halloween Decorations: Windows Edition
In 2011 my family moved to a new house. It was our first big move as a family, and days afterwards my baby had his first birthday. It was a tumultuous time with a new job, new house, unpacking, no nearby family or friends. It took a couple of months to unpack and by the time I did, I had a hefty supply of large cardboard boxes taking up an entire room of my house and the calendar had just ticked over to October. Instead of getting rid of the boxes, I decided to recycle them into Halloween Decor. All it took was some black paint, tissue paper, and a trusty box cutter. My new house was uniquely suited to monster silhouettes because of all of the windows in the front. I made a different one for each window, and taped them in place with duct tape.
A friend of mine shared the photo and moving box story with this website I hadn't heard of at the time -- "Reddit". And from there it went a little bit viral. Every year since I've seen it re-shared and re-posted across the interwebs.
Unfortunately cardboard moving boxes don't hold up over time. We only lived in that house for 2 years. When we moved we didn't take the old cardboard decorations with us. In our new home, I decided to re-create the experiment but in a more permanently reusable medium: Wood.
Now set-up each year is easy and our home immediately becomes a Monster Sanctuary each Halloween season. Take-down is also easy, and they store away flat!
Pegasus Pattern Published!!
The Crafty Intentions Pegasus Crochet Amigurumi Pattern is now available! You can find it here: https://www.ravelry.com/patterns/library/pegasus-5
Or Here: https://www.etsy.com/listing/635597418/digital-pegasus-crochet-amigurumi
© 2018 Megan Lapp, Crafty Intentions™. All rights reserved. This pattern is FOR PERSONAL USE ONLY. The pattern (or parts of it) may not be reproduced, distributed or resold, translated, published, altered, shared or posted (for sale or free) over the internet or offline. You can sell items made from this pattern, provided they are handmade by yourself in a limited number and you give credit to the designer. Please add the following lines to your item description and any item you are selling: “This item is handmade by (your name) from a design and pattern by Megan Lapp, Crafty Intentions™”.
Featured Pattern: Yoda hat
Photo by Danielle Foster Creations: https://www.facebook.com/DanielleFosterCreations/
Hat made by me!
[Free] Pattern for the hat: https://www.ravelry.com/patterns/library/crochet-yoda-hat
This went well! I enjoyed making this hat for this little new one. It would be the perfect addition to a cute little onesie for a newborn's first Halloween!
Halloween Costumes!
Since my children were born, I have done a new Halloween Costume every year and most have been handmade. There have been rules and guidelines for these costumes that I follow. 1) They must be Cold-weather friendly. 2)They must match when I have more than one child. 3) I prefer book-related costumes. This year they are finally making individual requests (She wants to be a Pink Cat, He wants to be Max from Where the Wild Things Are - (Revisited, as you'll see below), Sigh), and I will no longer get to choose. So to celebrate 8 years of Halloween Costumes done my way, I would like to share those costumes with you!
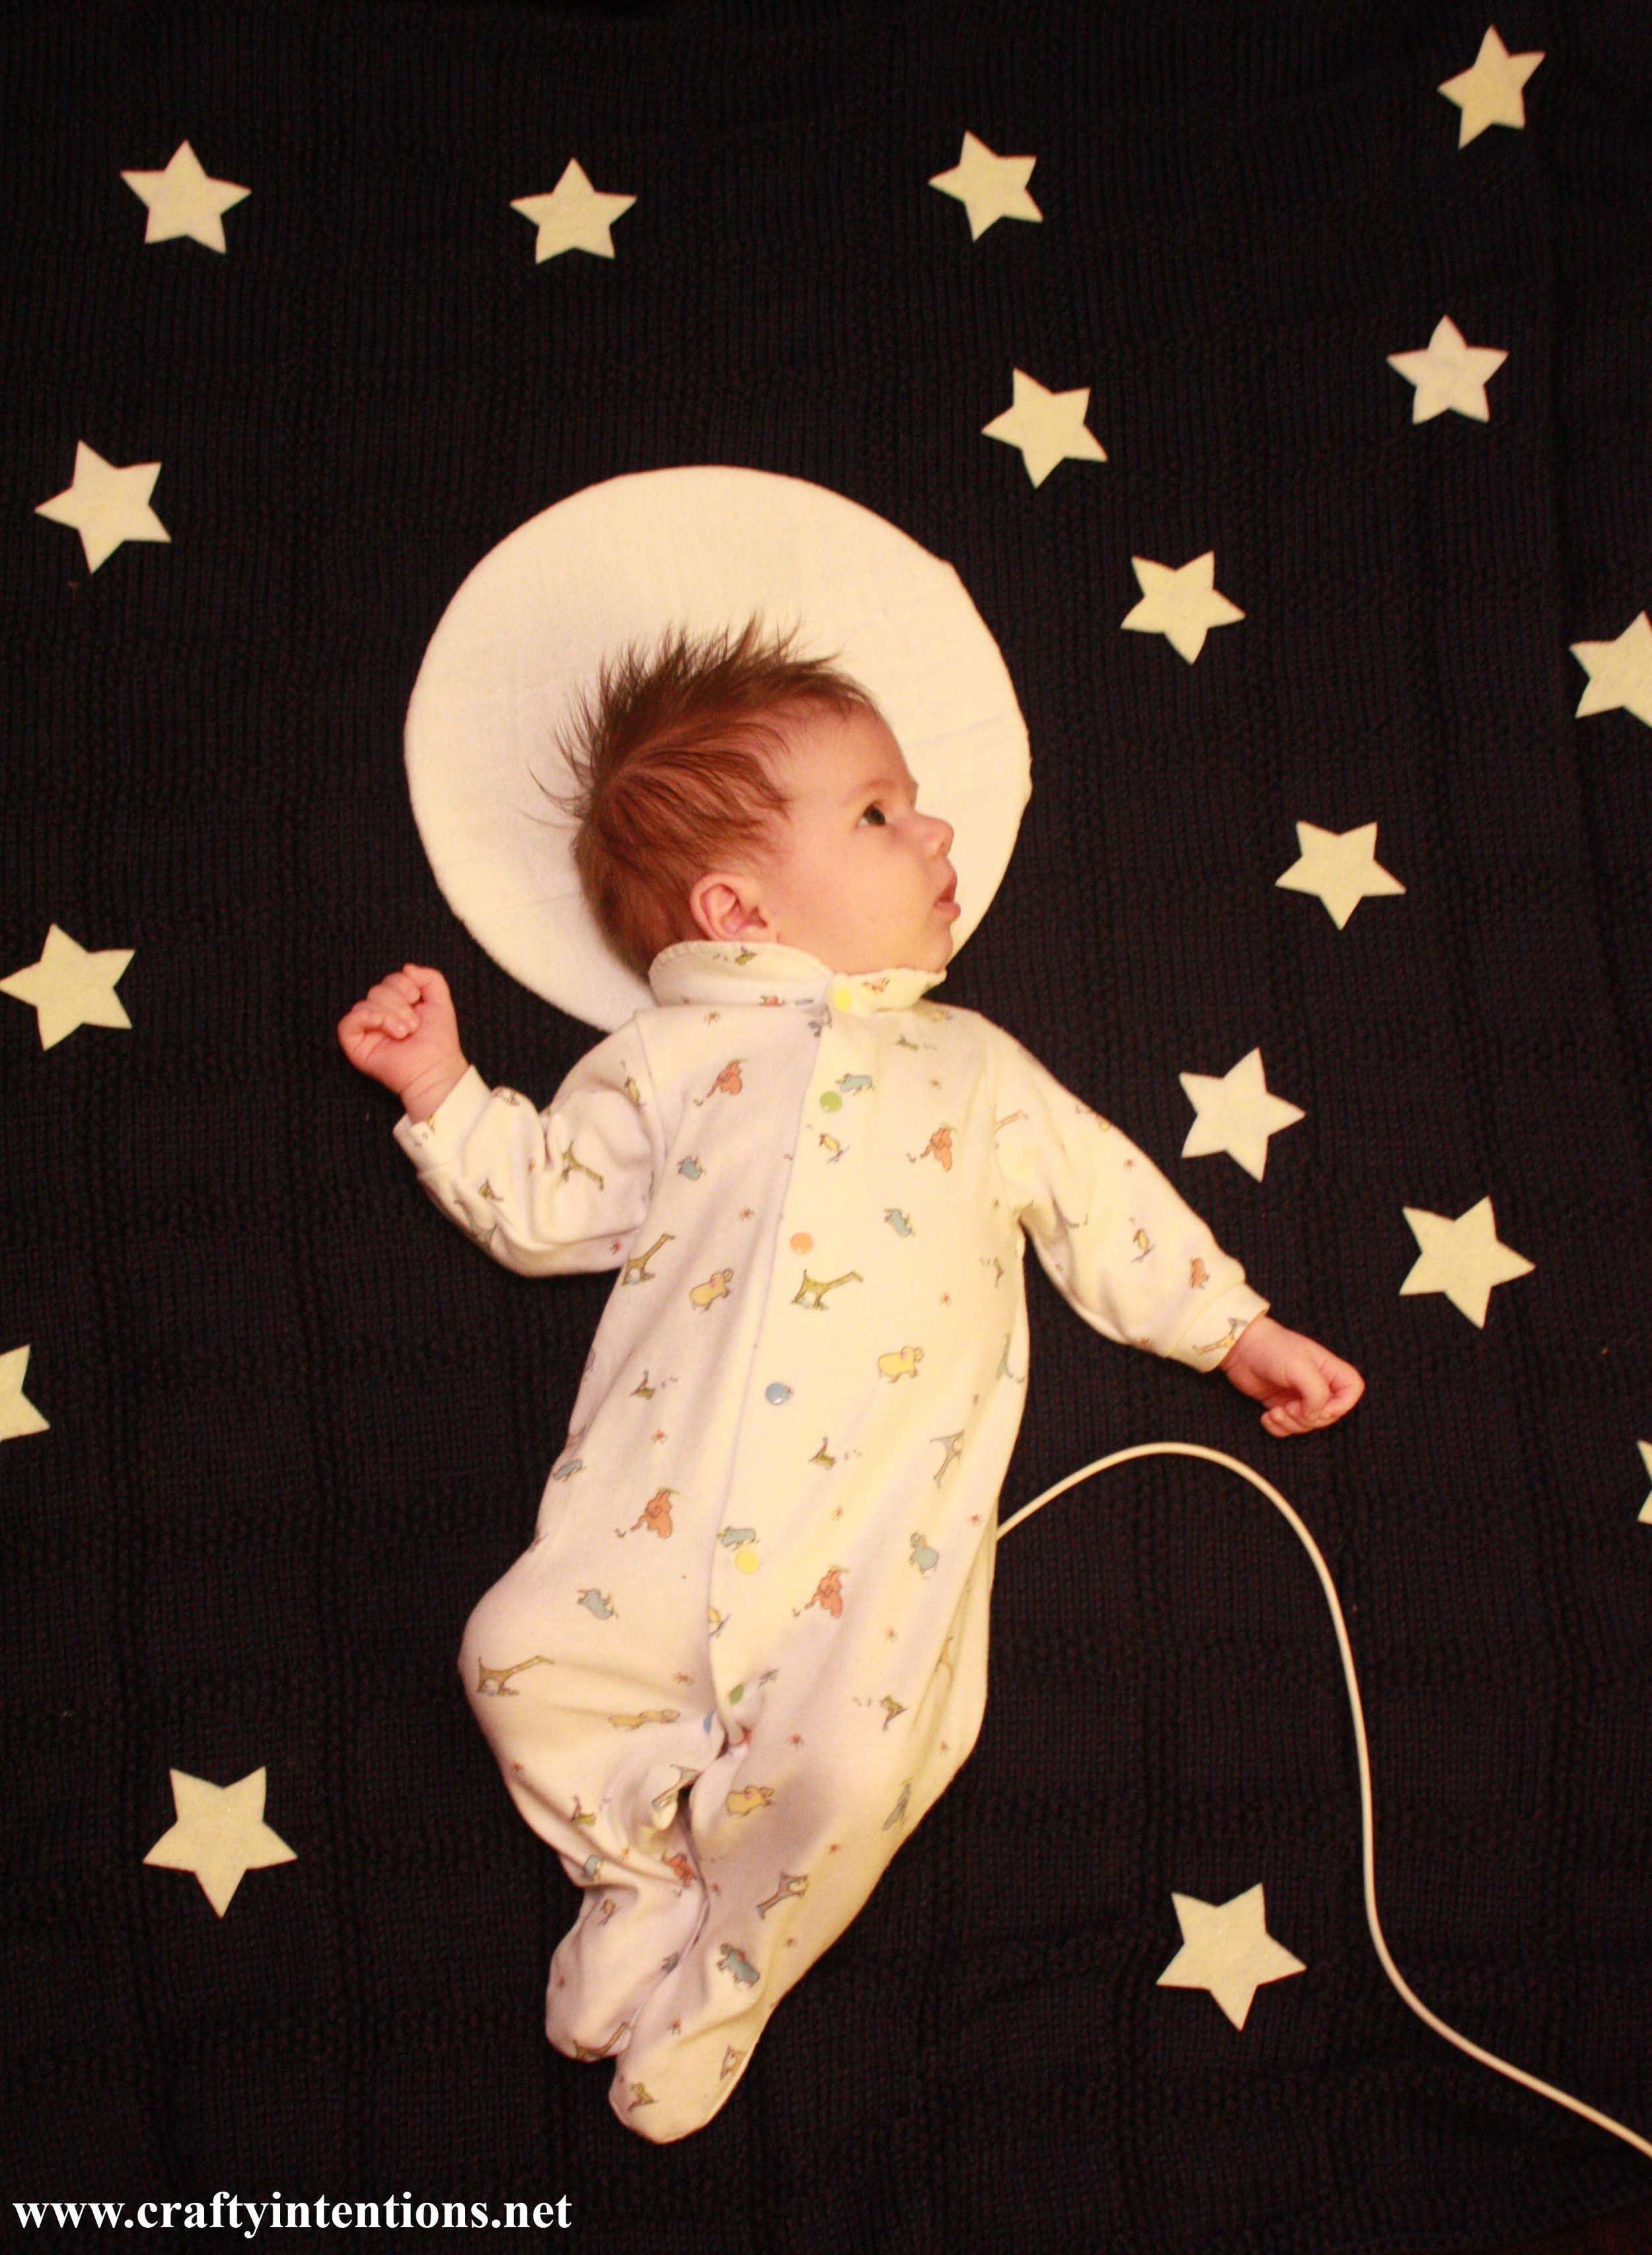
Year 1: Astronaut [Bonus costume! First Ever!]
Hand-assembled... Yes, I put my precious baby's head on a plate in service of looking like an astronaut. I stand by my actions.
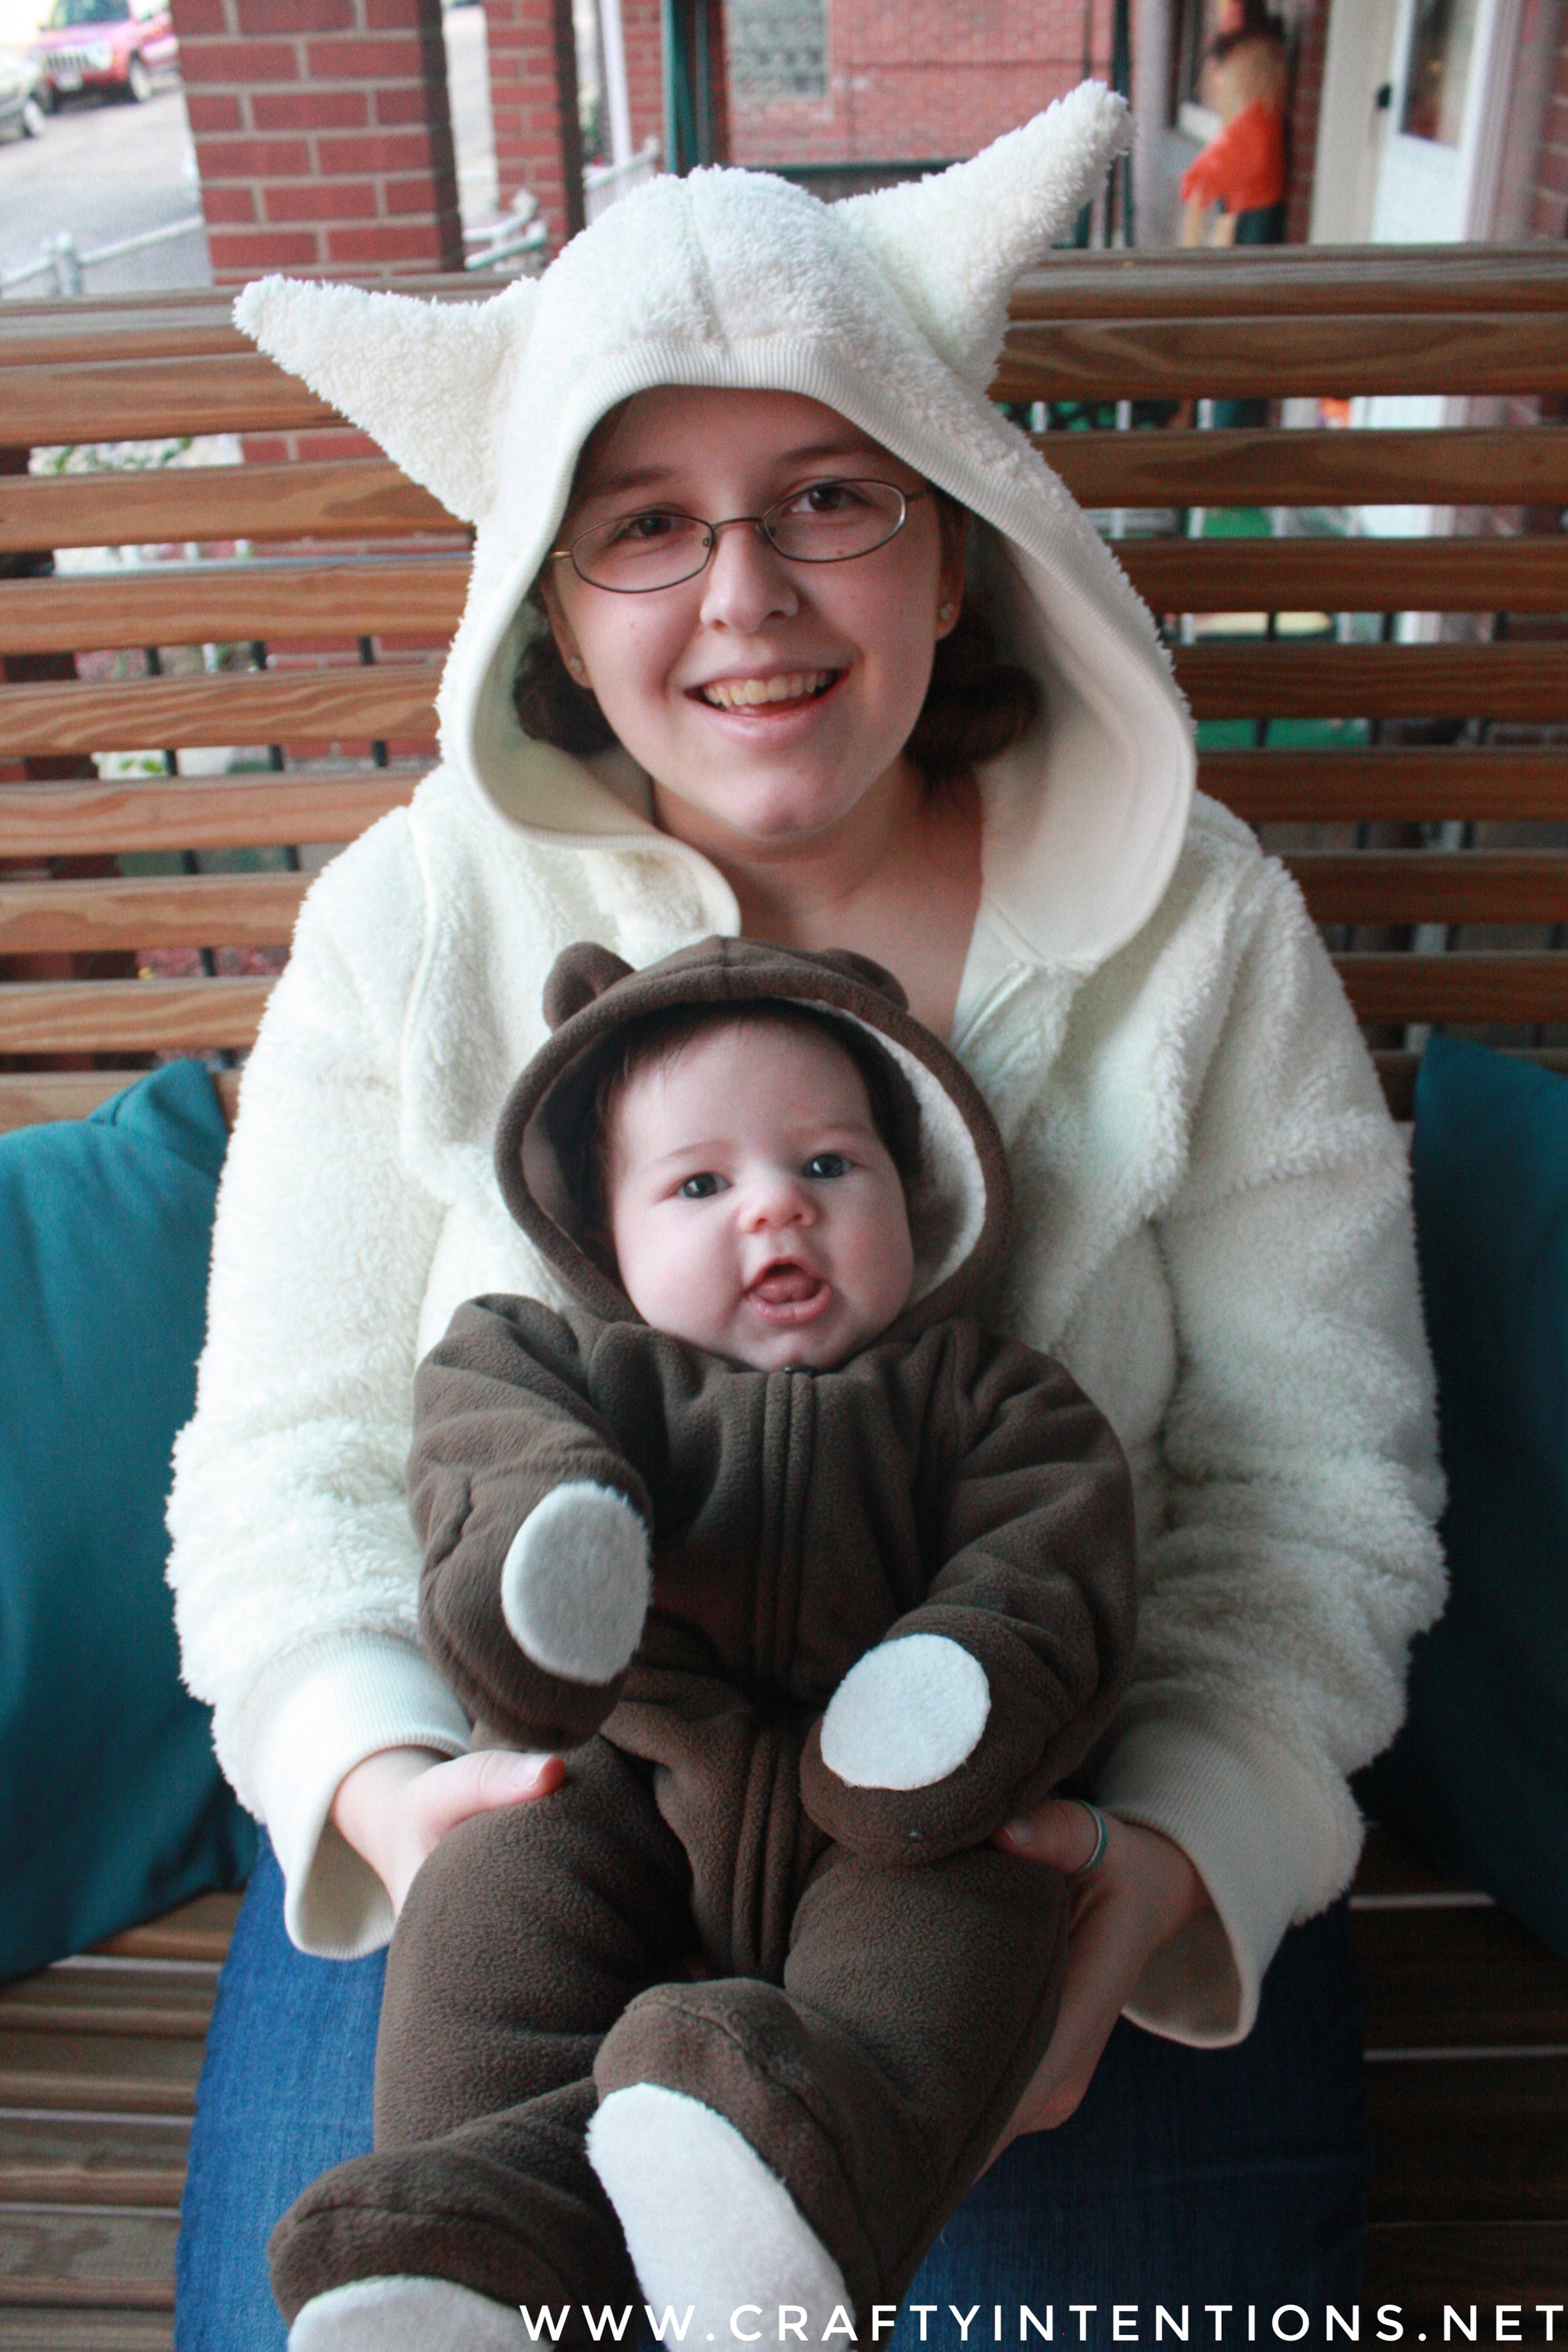
Teddy Bear [Official Halloween]
Store bought, hand-altered.
Year 2: Monster [Official Halloween]
Hand made all the way! ... Mostly by my mom. Though I did do the adult hoodie decorations myself.
Year 3: Max, Where the Wild Things Are [Official Halloween]
I store bought the one-piece pajamas. I hand-made all the detail (added the feet/paws, buttons, ears and tail. Made the crown with fur edging)
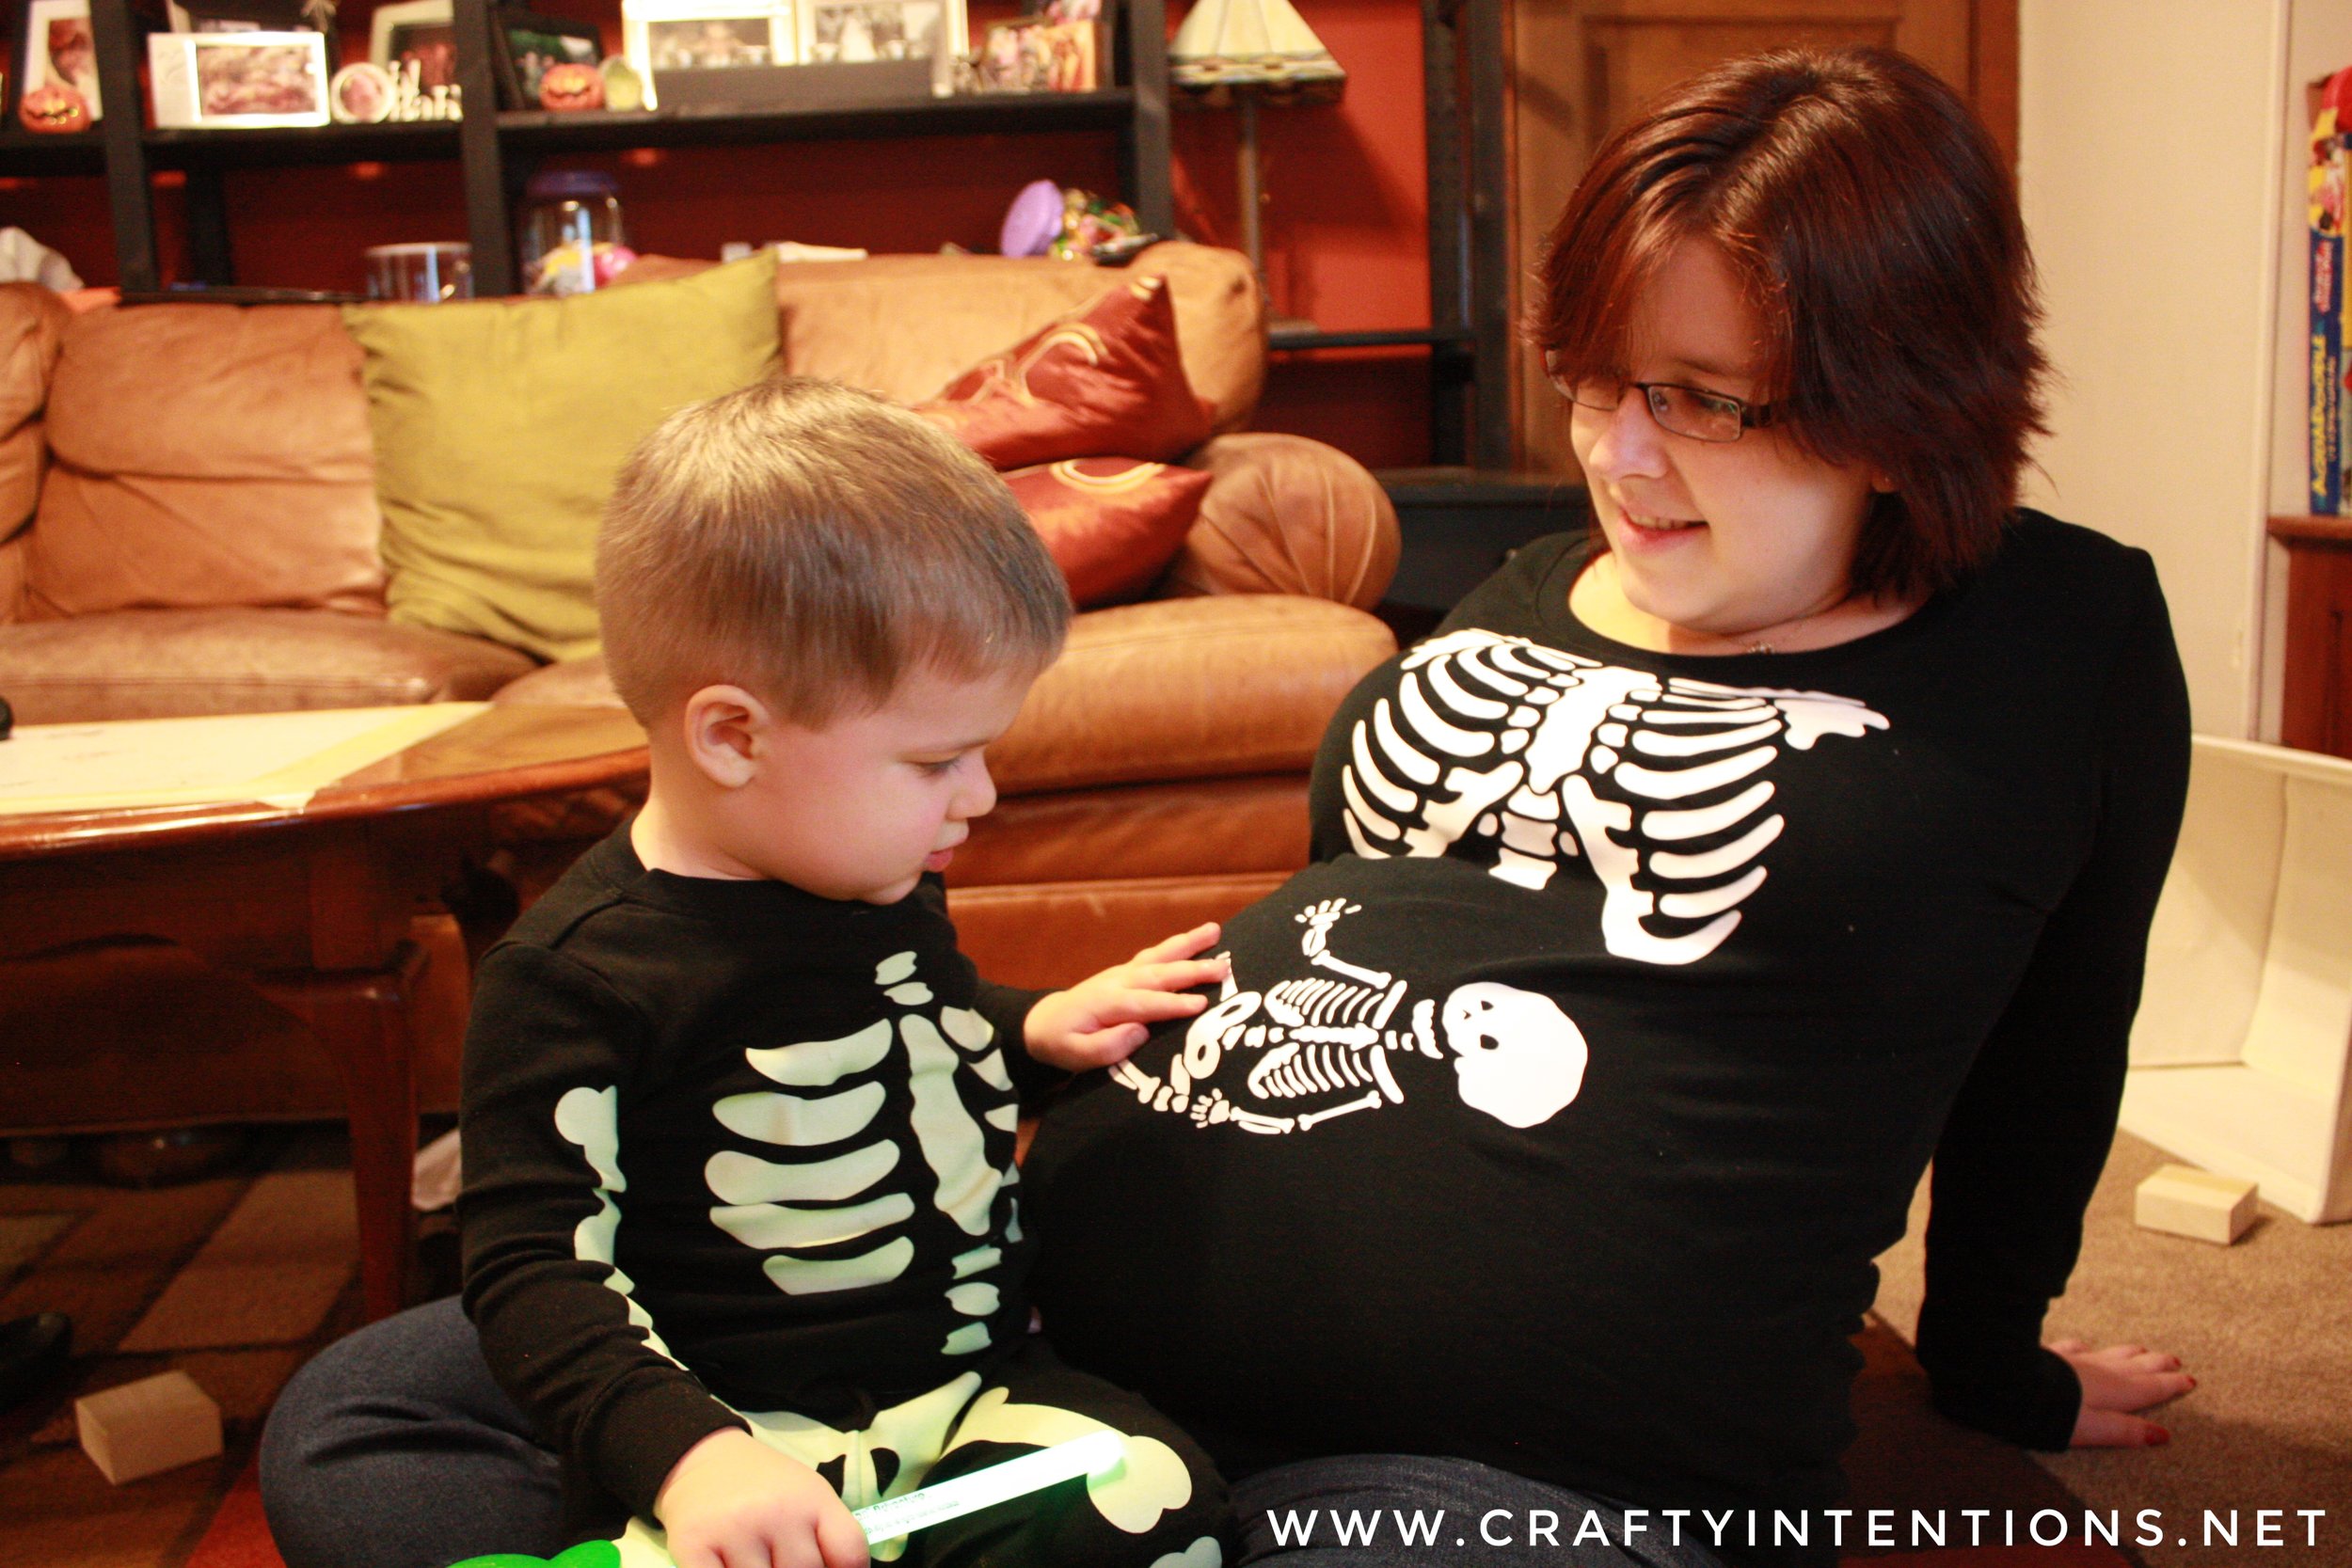
Skeletons [BONUS Costume! aka My Daughter's first costume!]
Pajamas with skeletons from Carters, Shirt for me with Skeletons from Etsy
Year 4: The Very Hungry Caterpillar and The Very Beautiful Butterfly [Official Halloween]
The Hungry Caterpillar handmade from fleece as a slip on costume (sandwich board style) over top green pajamas.
The Very Beautiful Butterfly with a store bought Orange sweatshirt and handmade butterfly wings from fleece.
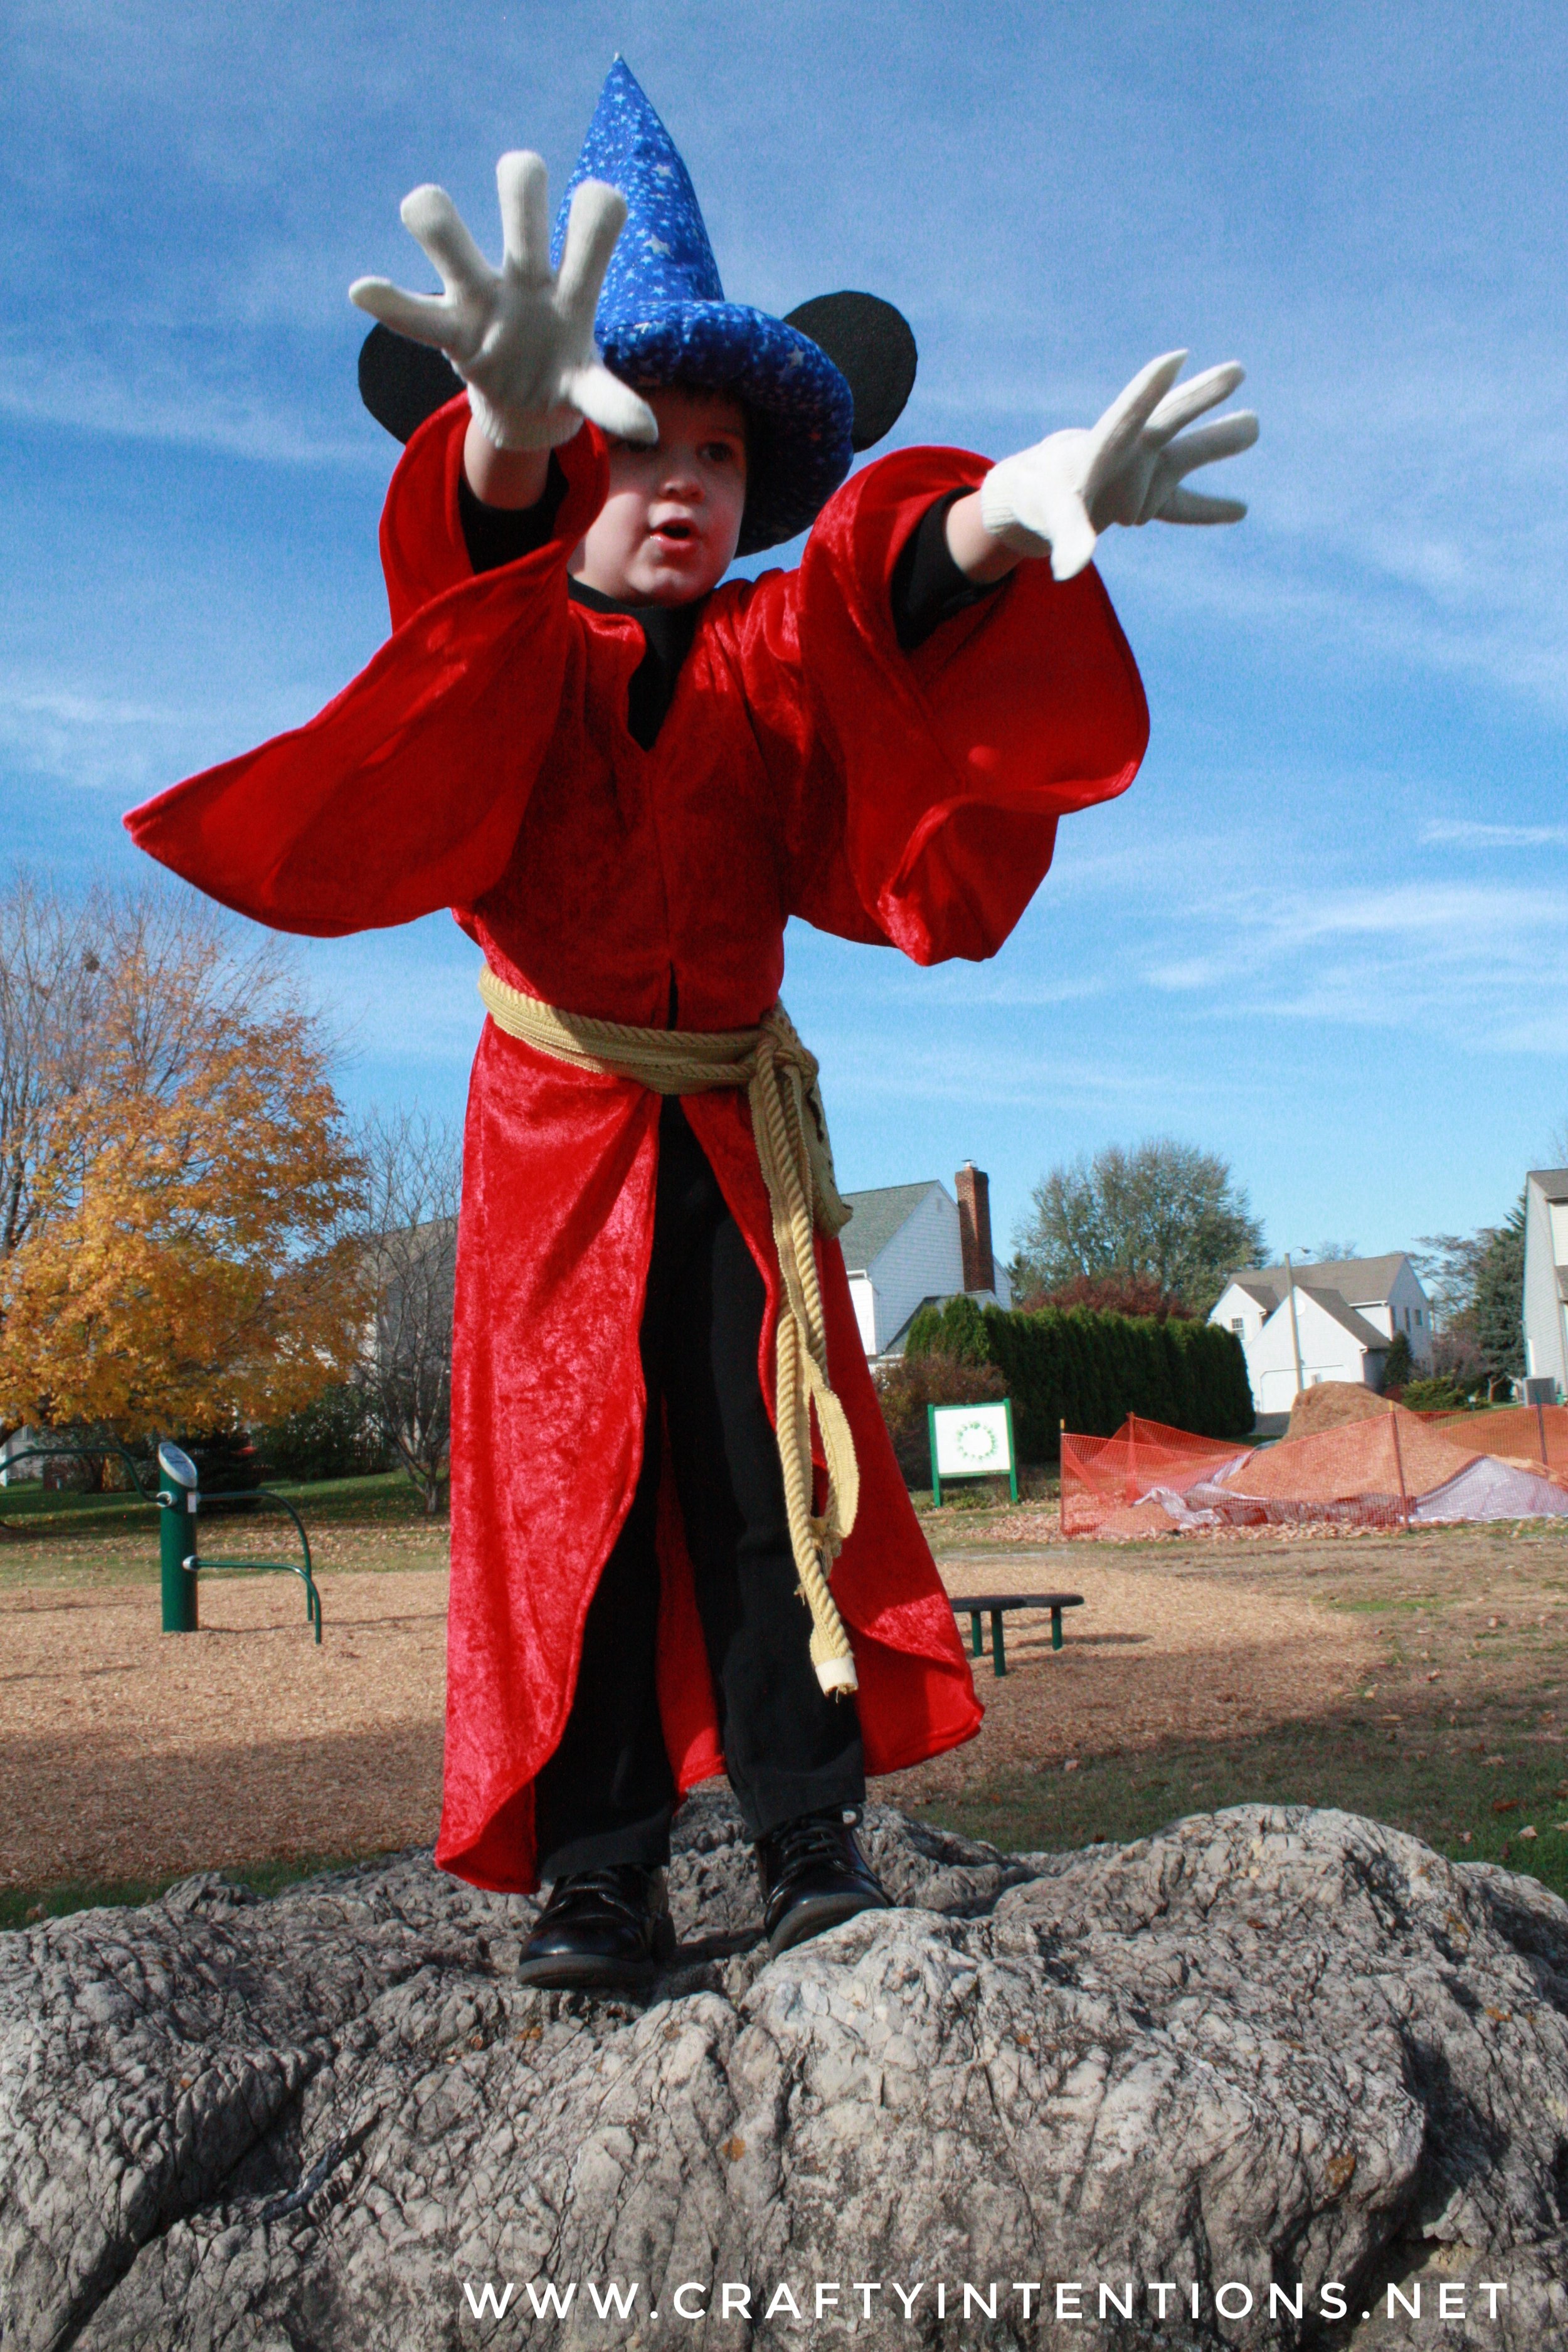
Year 5: Sorcerer's Apprentice & Minnie Mouse [Official Halloween]
Sorcerer's Apprentice Mickey was cheapy knit winter gloves and a golden rope I found at a craft thrift store. My Mom made the hat, I added the ears. I sewed the red robes!
Minnie Mouse was a machine stitched Red white-polka-dot dress from a pattern on Etsy with lots of petticoat material and lace underneath, over a black long sleeved t-shirt and leggings. I made the ears from felt and bows attached to hair clips!
Bonus Costume! I was particularly ambitious this year and made homemade costumes for the Renaissance Fair for both kids!
Flynn Rider utilized leggings, a white button down shirt, this free pattern for boot covers using microsuede material, and a Flynn Rider vest of my own making!
Renaissance Fair princess was made using the same pattern as the Minnie Mouse dress, just with some alterations for the over-lay!
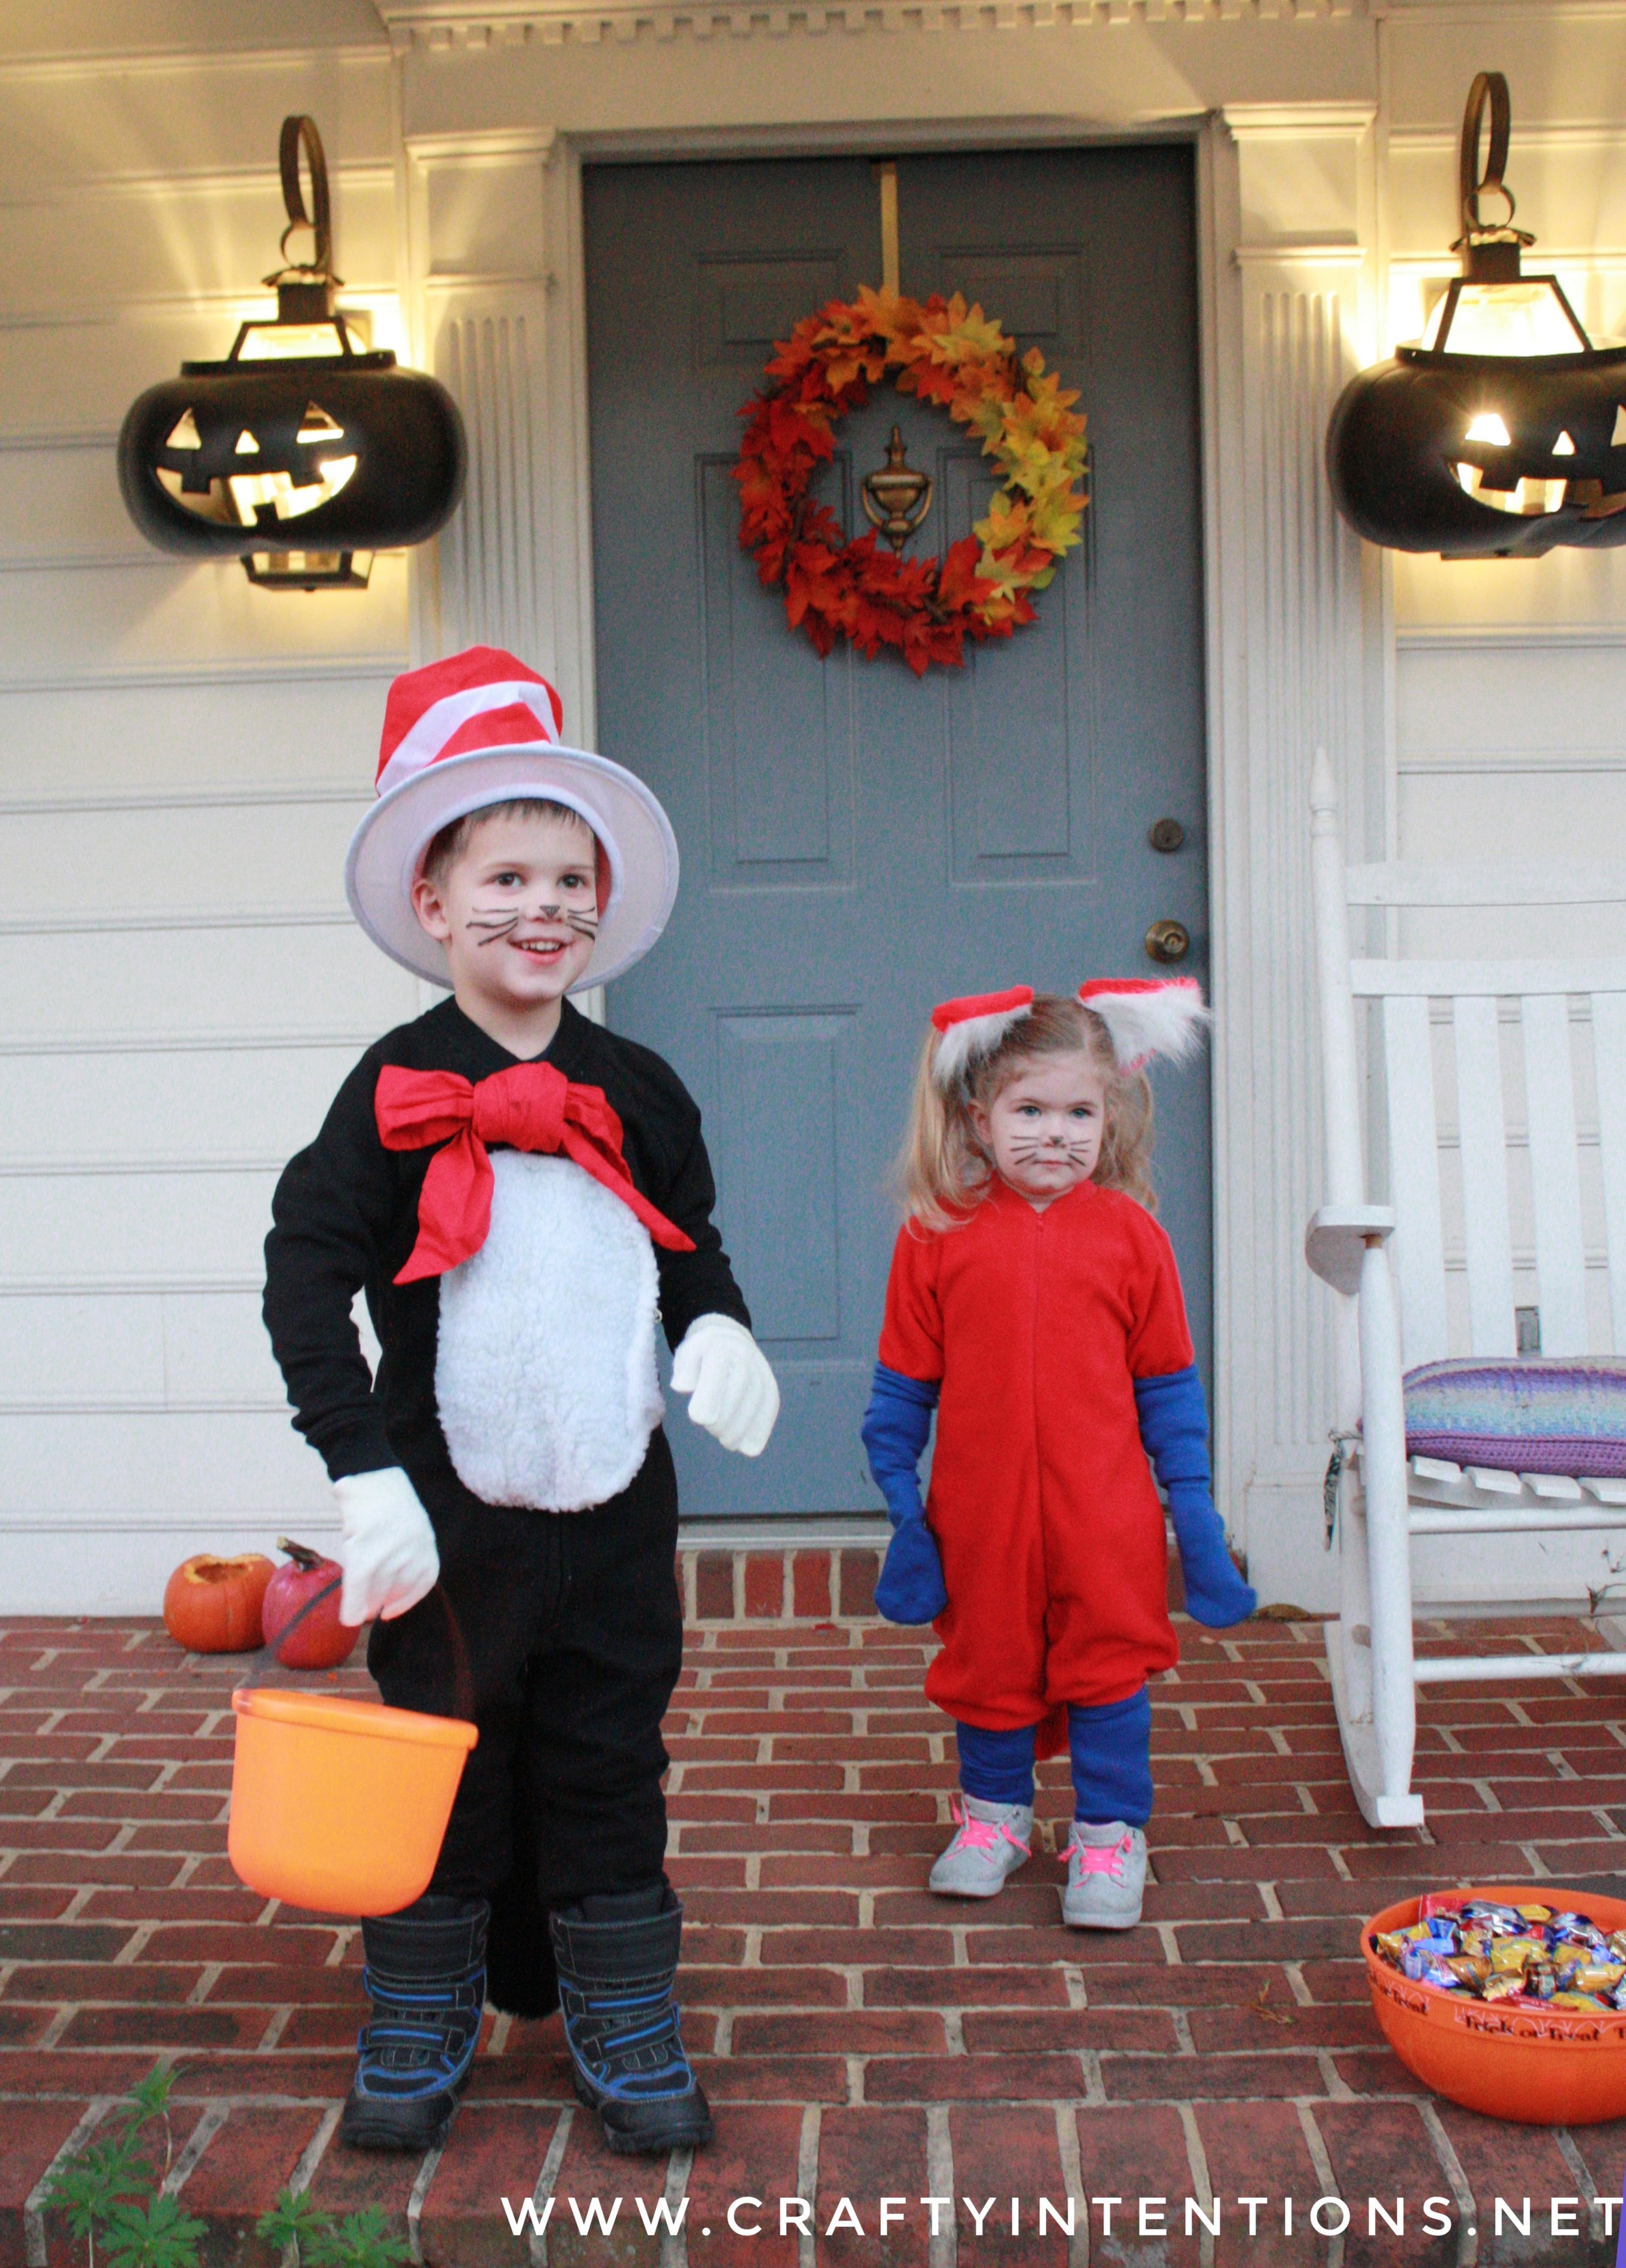
Year 6: The Cat in the Hat and Fox in Socks [Official Halloween]
Both costumes used store-bought solid-color one-piece pajamas. The fox in socks used 2 pairs of blue soccer socks, and handmade ears and tail. The Cat in the Hat costume used a store-bought hat and gloves and handmade belly and tie.
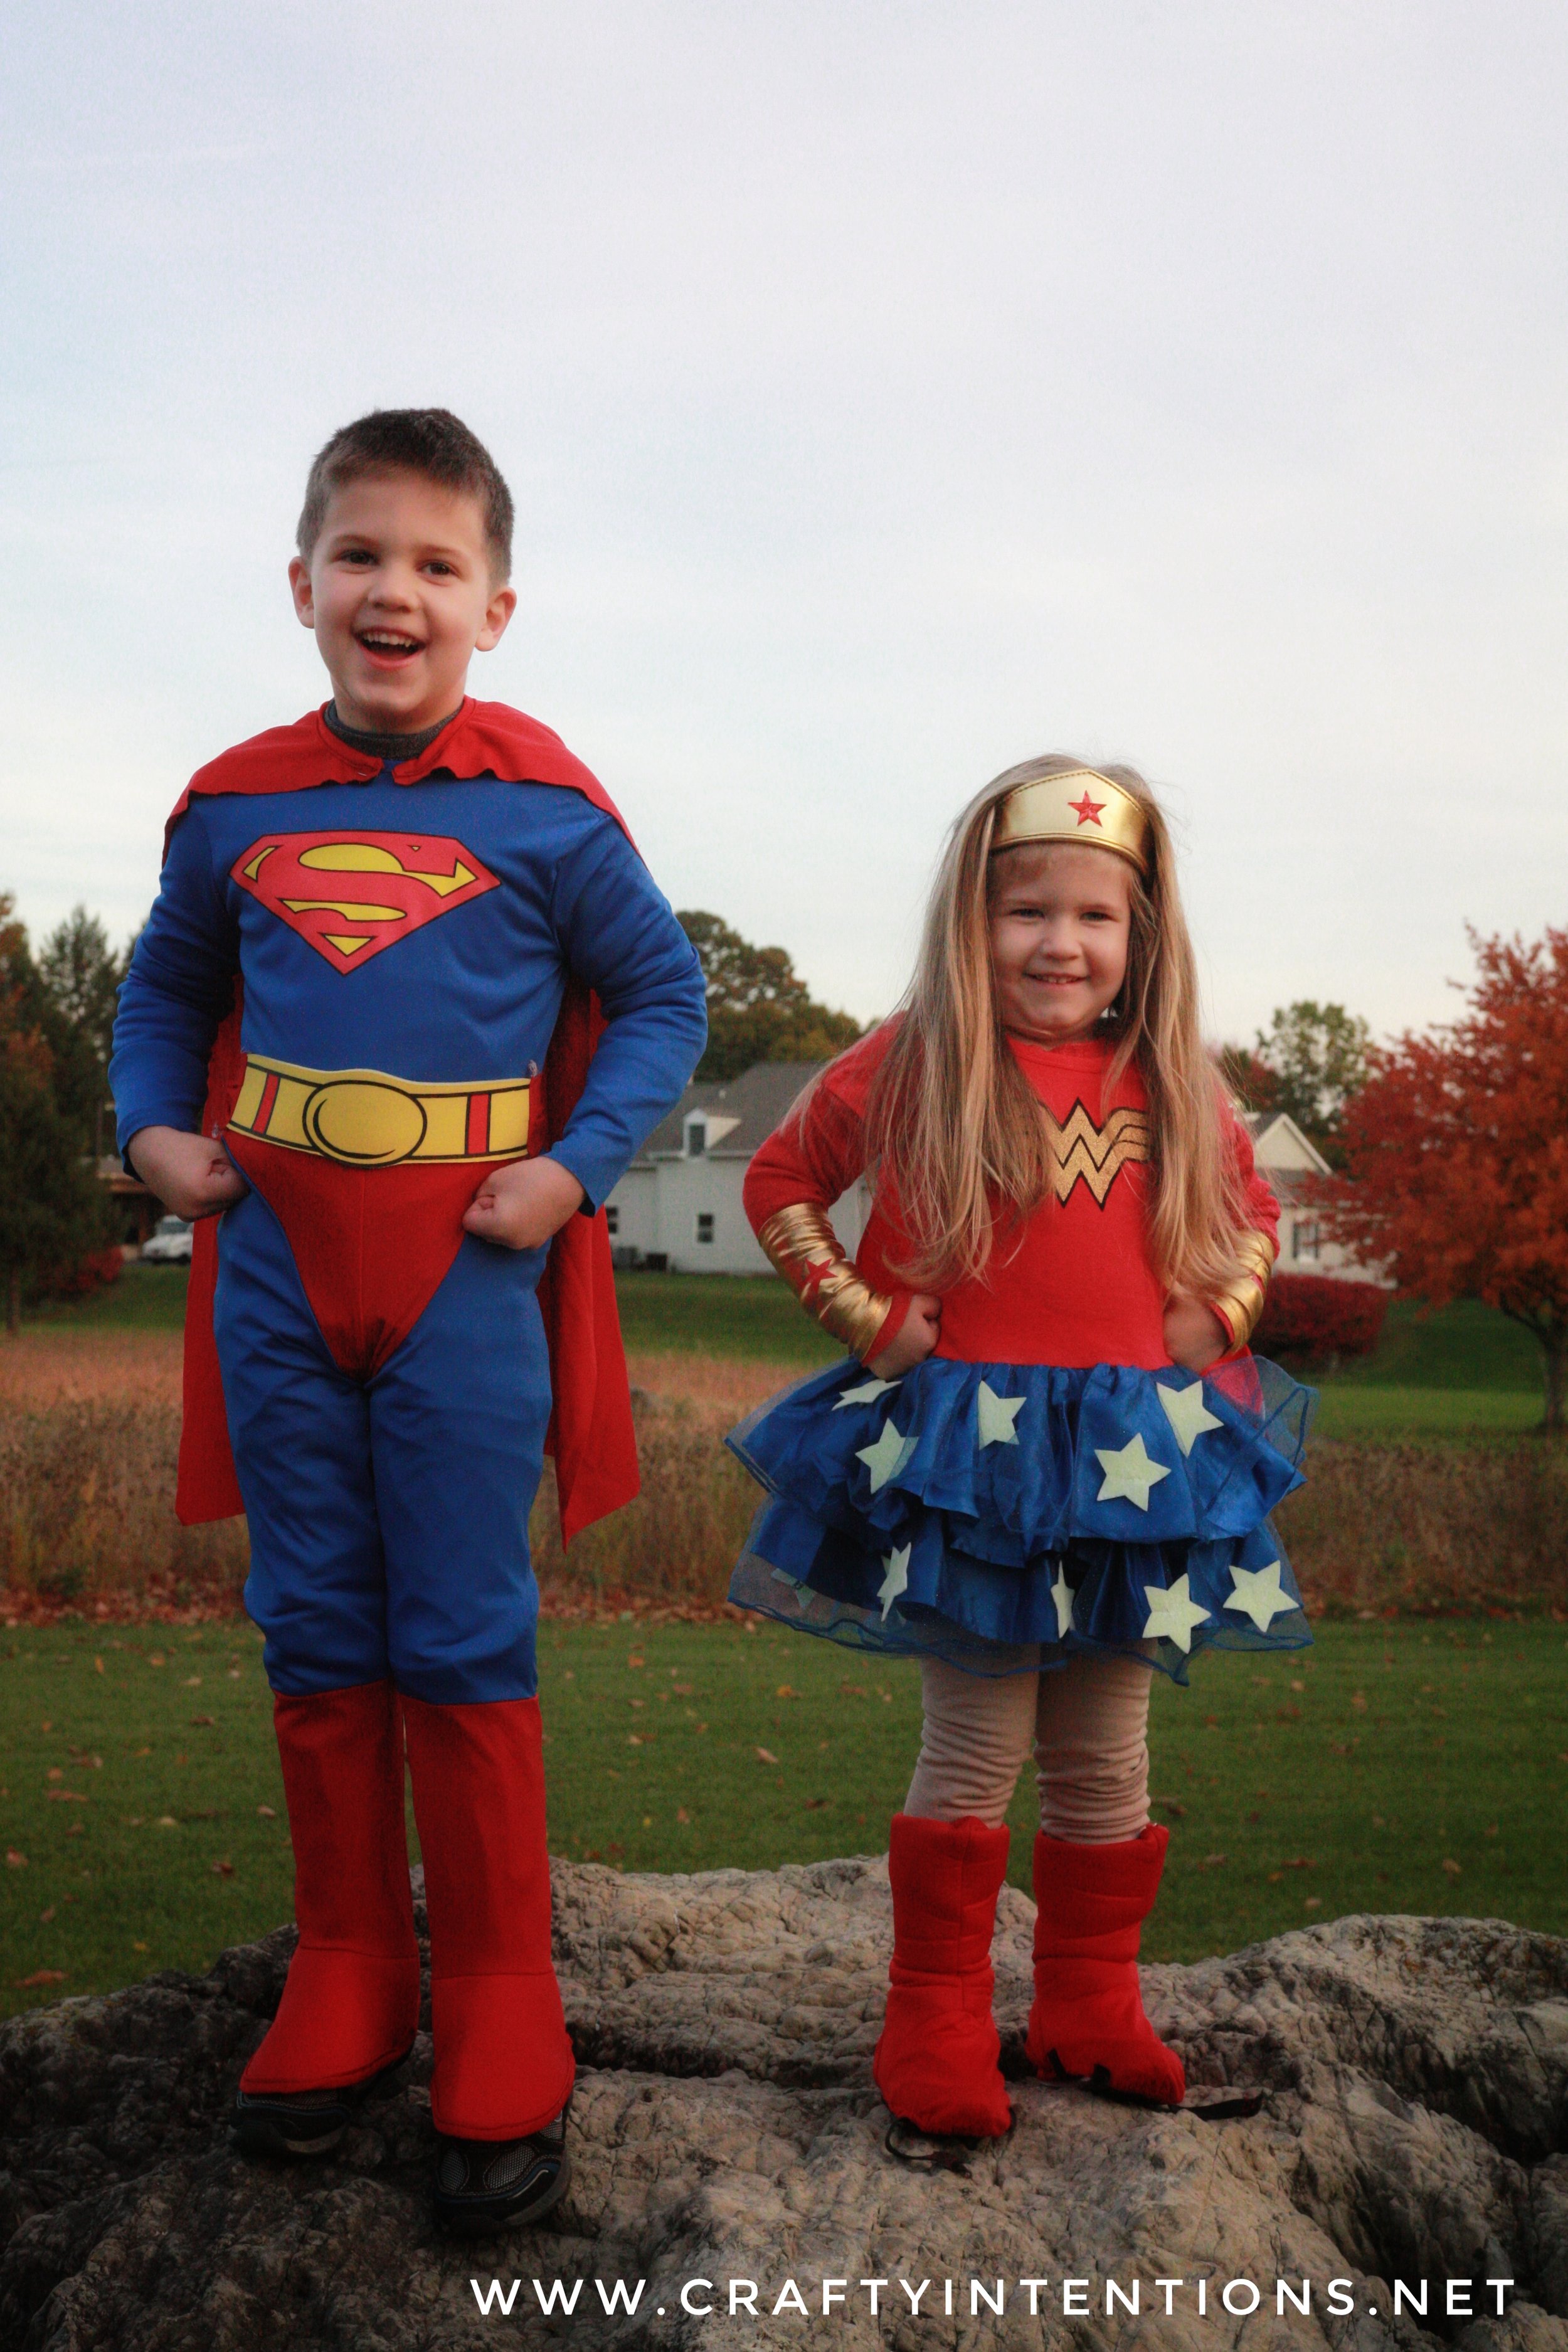
Year 7: Superman and Wonder Woman [Official Halloween]
Superman was store bought 100%. Wonder Woman was partially store bought, and partially handmade. I added glow in the dark stars, I altered store bought accessories to fit her.
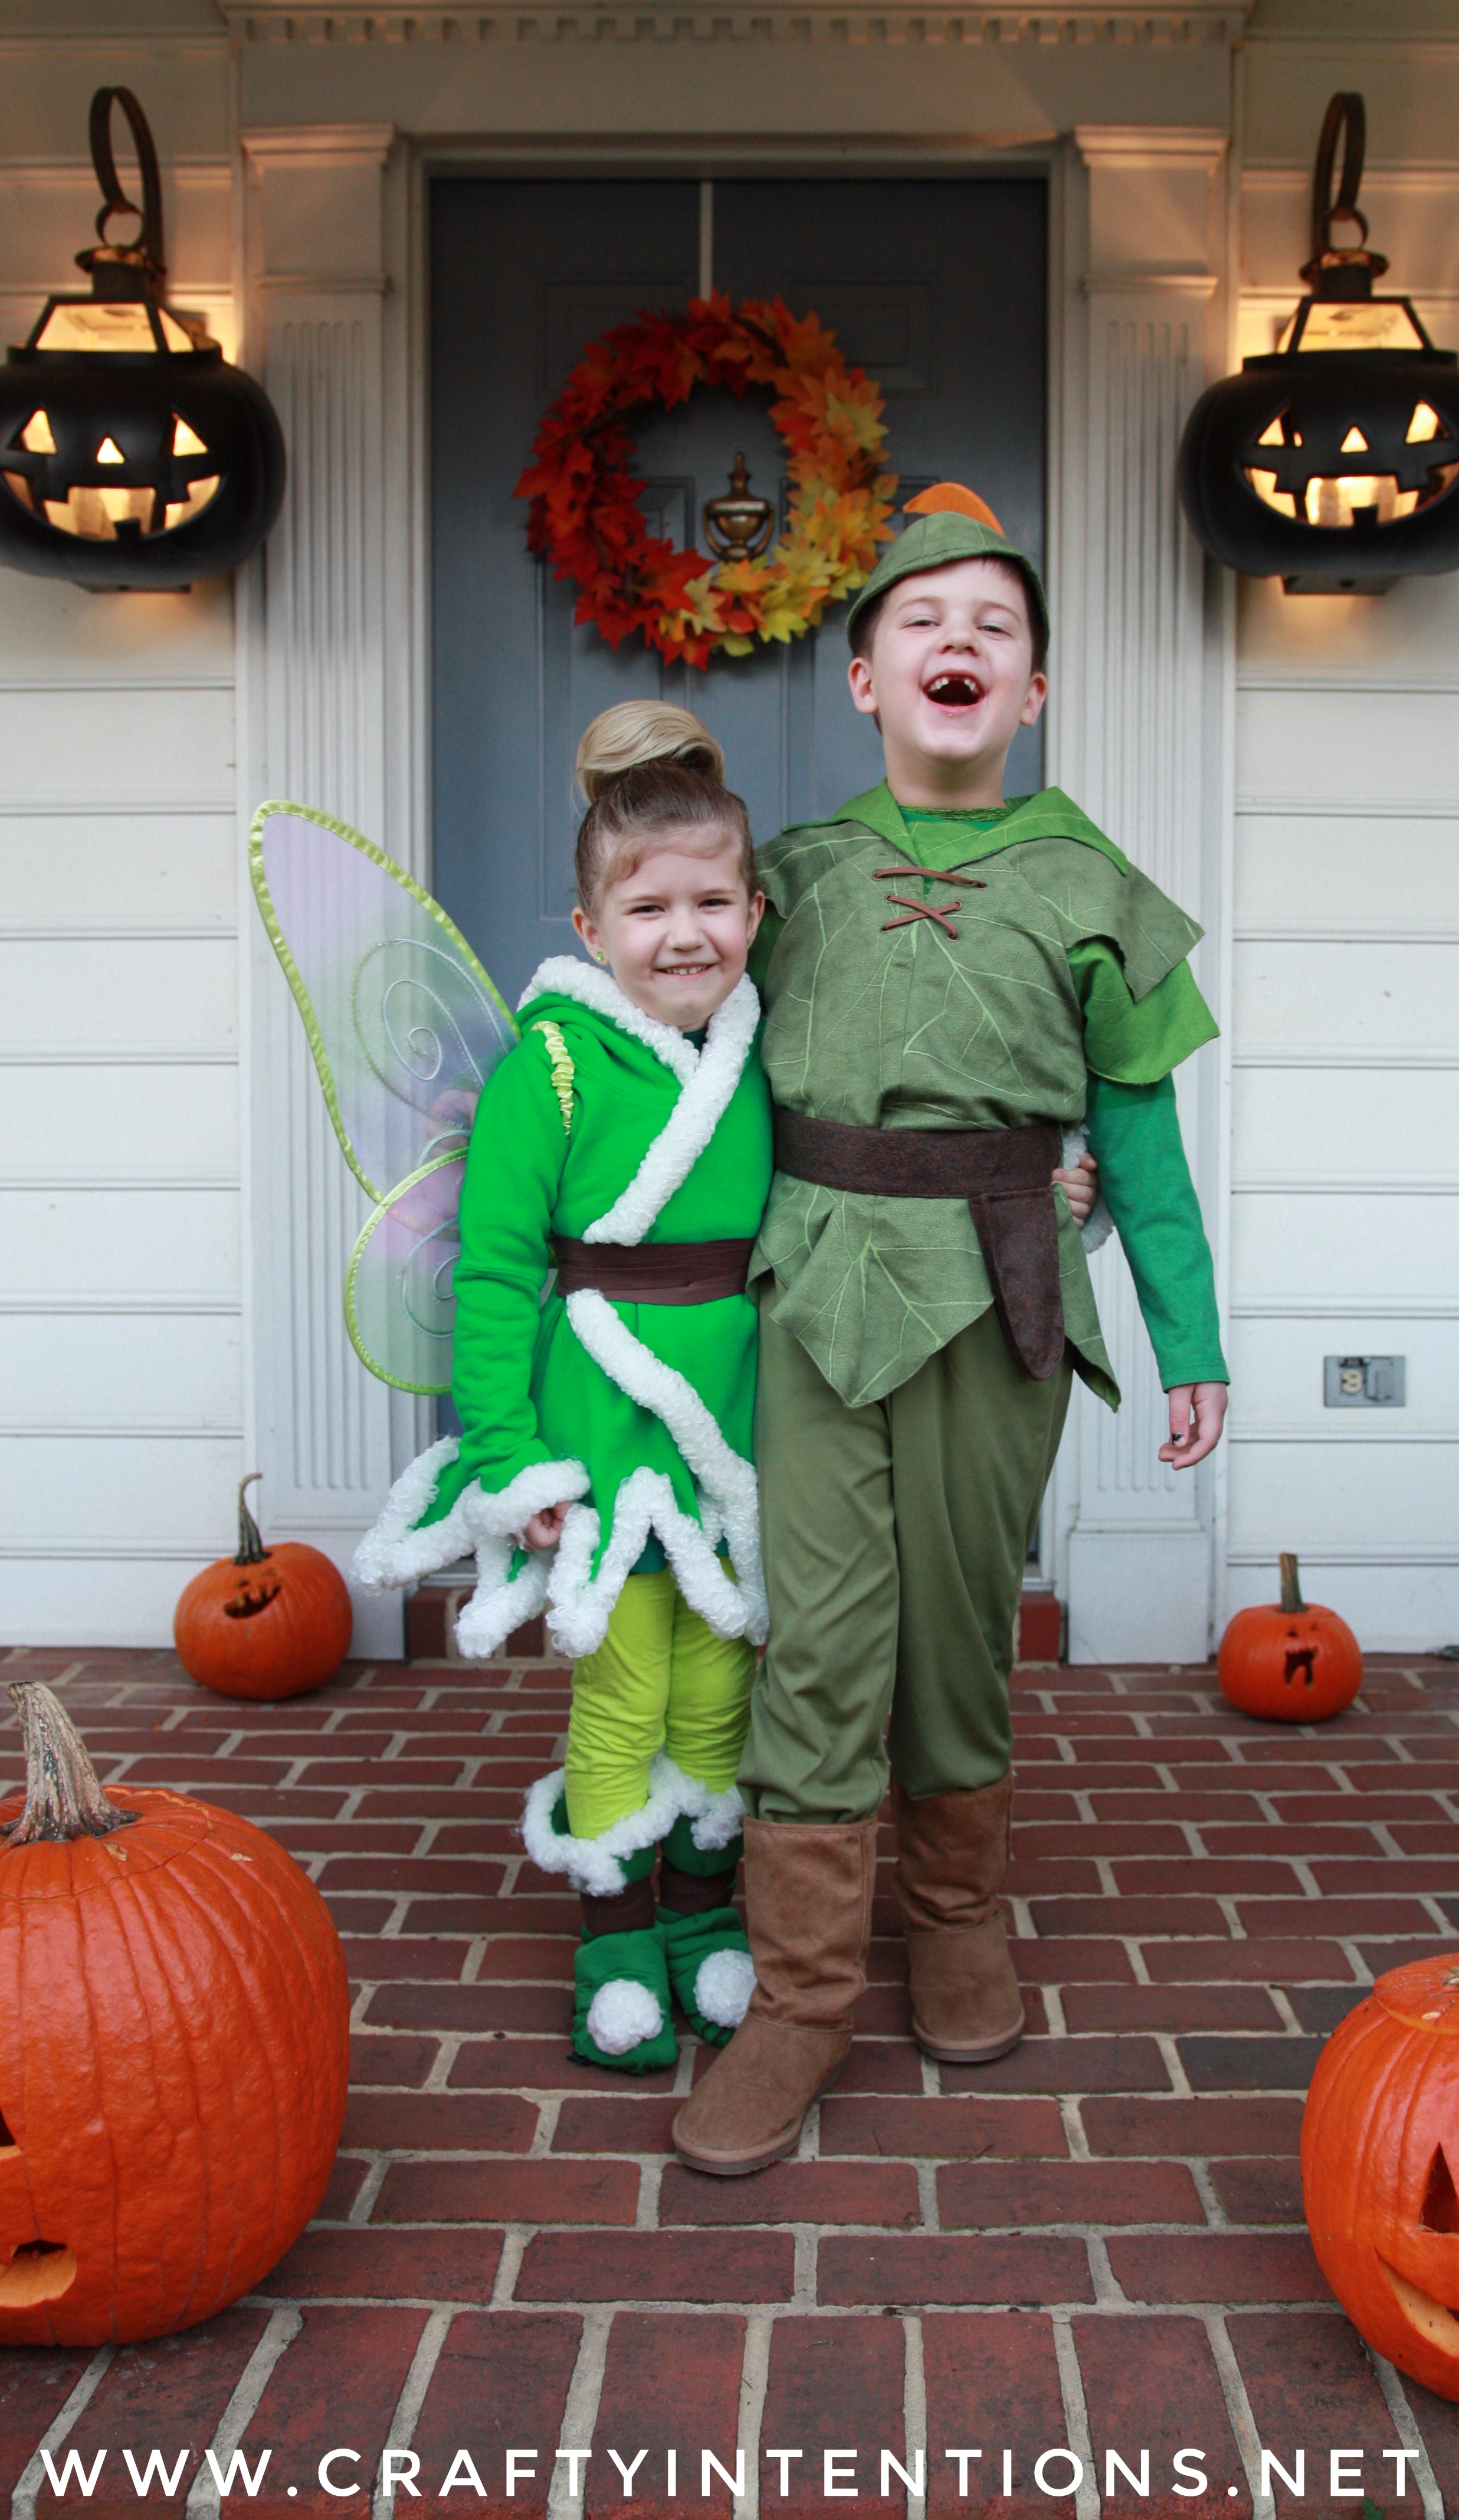
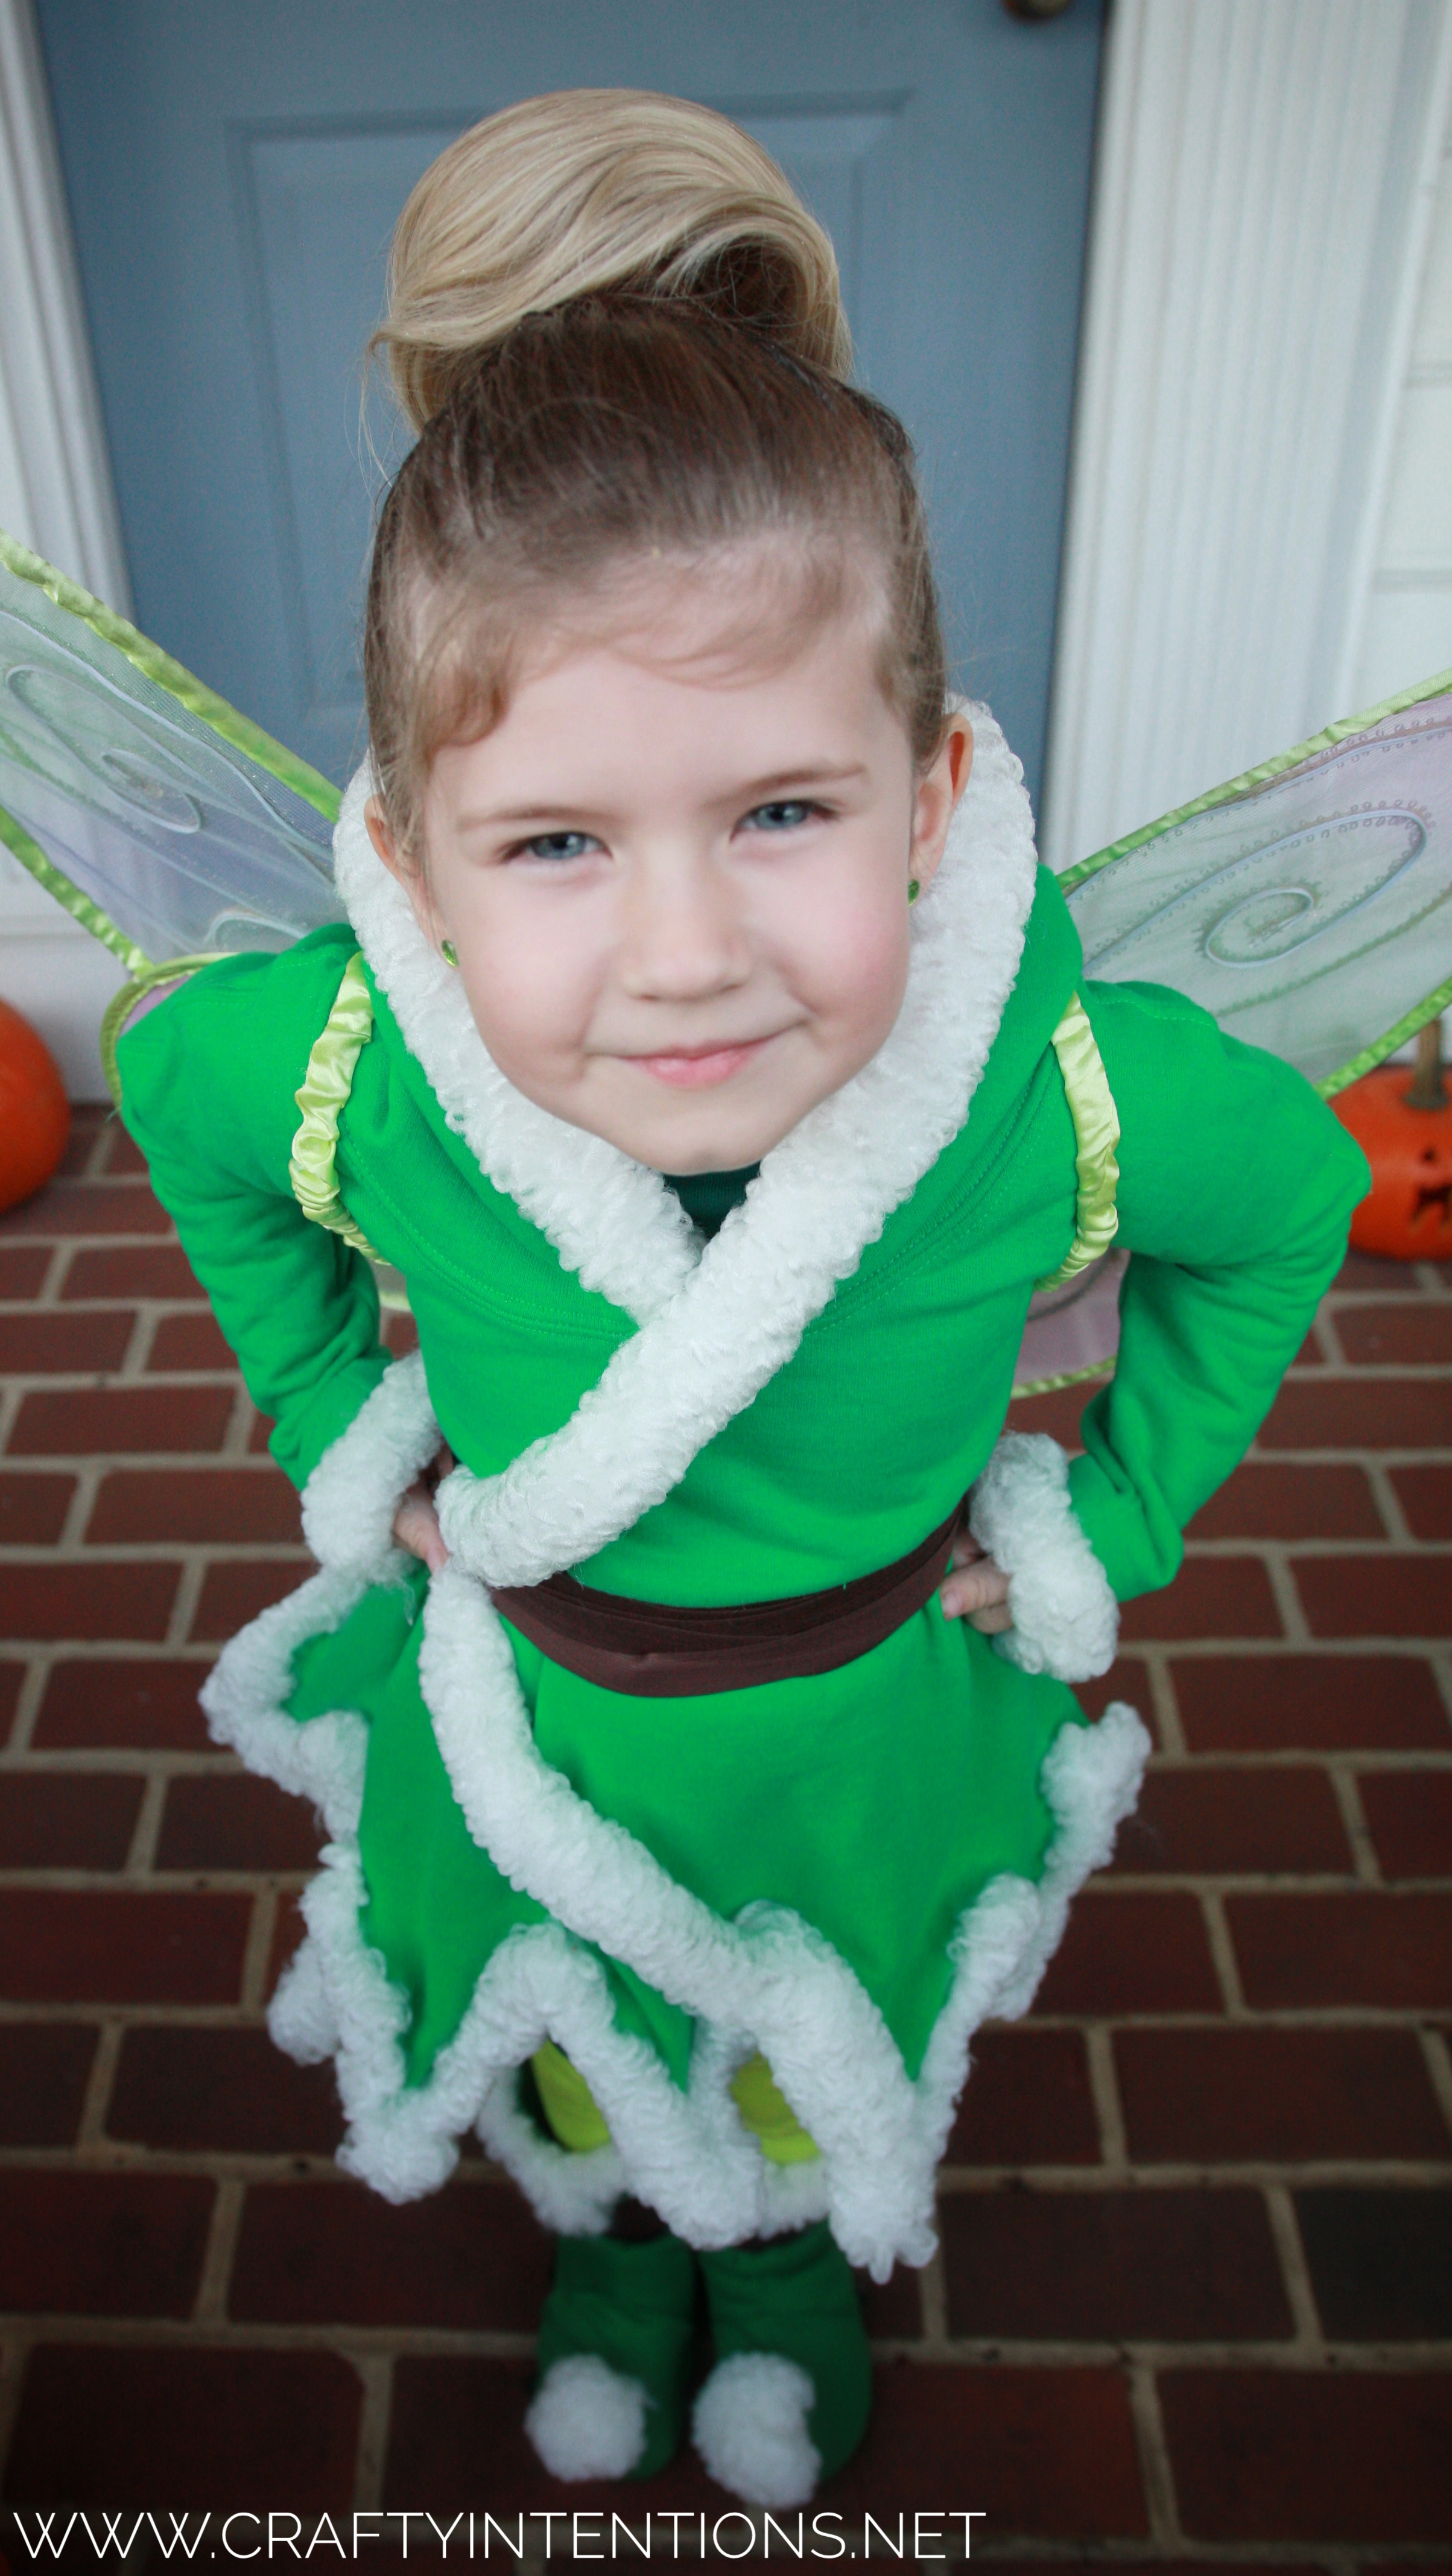
Year 8: Peter Pan and Winter Tinkerbell [Official Halloween]
Peter Pan was store bought. Tinkerbell was almost all handmade! I bought a hair-bun, as we had cut her hair short, and I bought green boot covers. I found light-up fairy wings at a yard sale. The Dress was made from an adult sweatshirt, and extra large pipe cleaners. Brown accents are lengths of elastic!
Crafty Intentions: Failed Results, Part 4: Felt Thingys
Why did I make this?
I sure don't know. It took A LOT of hand stitching.
Why.


