• Portfolio
  • PATTERN STORE!
  • Books
  • Errata
  • Pattern Filter
  • blog
  • Publicity
  • Videos
  • Yarn Calculator
  • about
  • contact
  • Fairs & Contests
Crafty Intentions
  • Portfolio
  • PATTERN STORE!
  • Books
  • Errata
  • Pattern Filter
  • blog
  • Publicity
  • Videos
  • Yarn Calculator
  • about
  • contact
  • Fairs & Contests

Pincushions forever.

There was a time when I became obsessed with making pincushions.  Why? Everyone needs a pincushion, right? Wrong. Very few people need pincushions.  But I thought that it was a good way to explore making felt-hand-stitched-softies with a purpose.

2009 Green Cactus Pincushion-01.jpeg

First there were cacti.  I made the pattern myself. It's felt, stuffed with polyfil (with a little bit of steel wool at the end of each cactus branch to keep the pins and needles sharp!).  I glued it into the terra cotta pot.  Not a great idea, because pots like this break easily.  One curious cat later, and you'd find yours shattered on the floor with no ability to fix it. Also, they are a bit large and in charge - I'm not sure anyone needs a pin cushion of this gigantic size. Fail.

2009 Pink Octopus Snap Bracelet Pincushion-01.jpeg

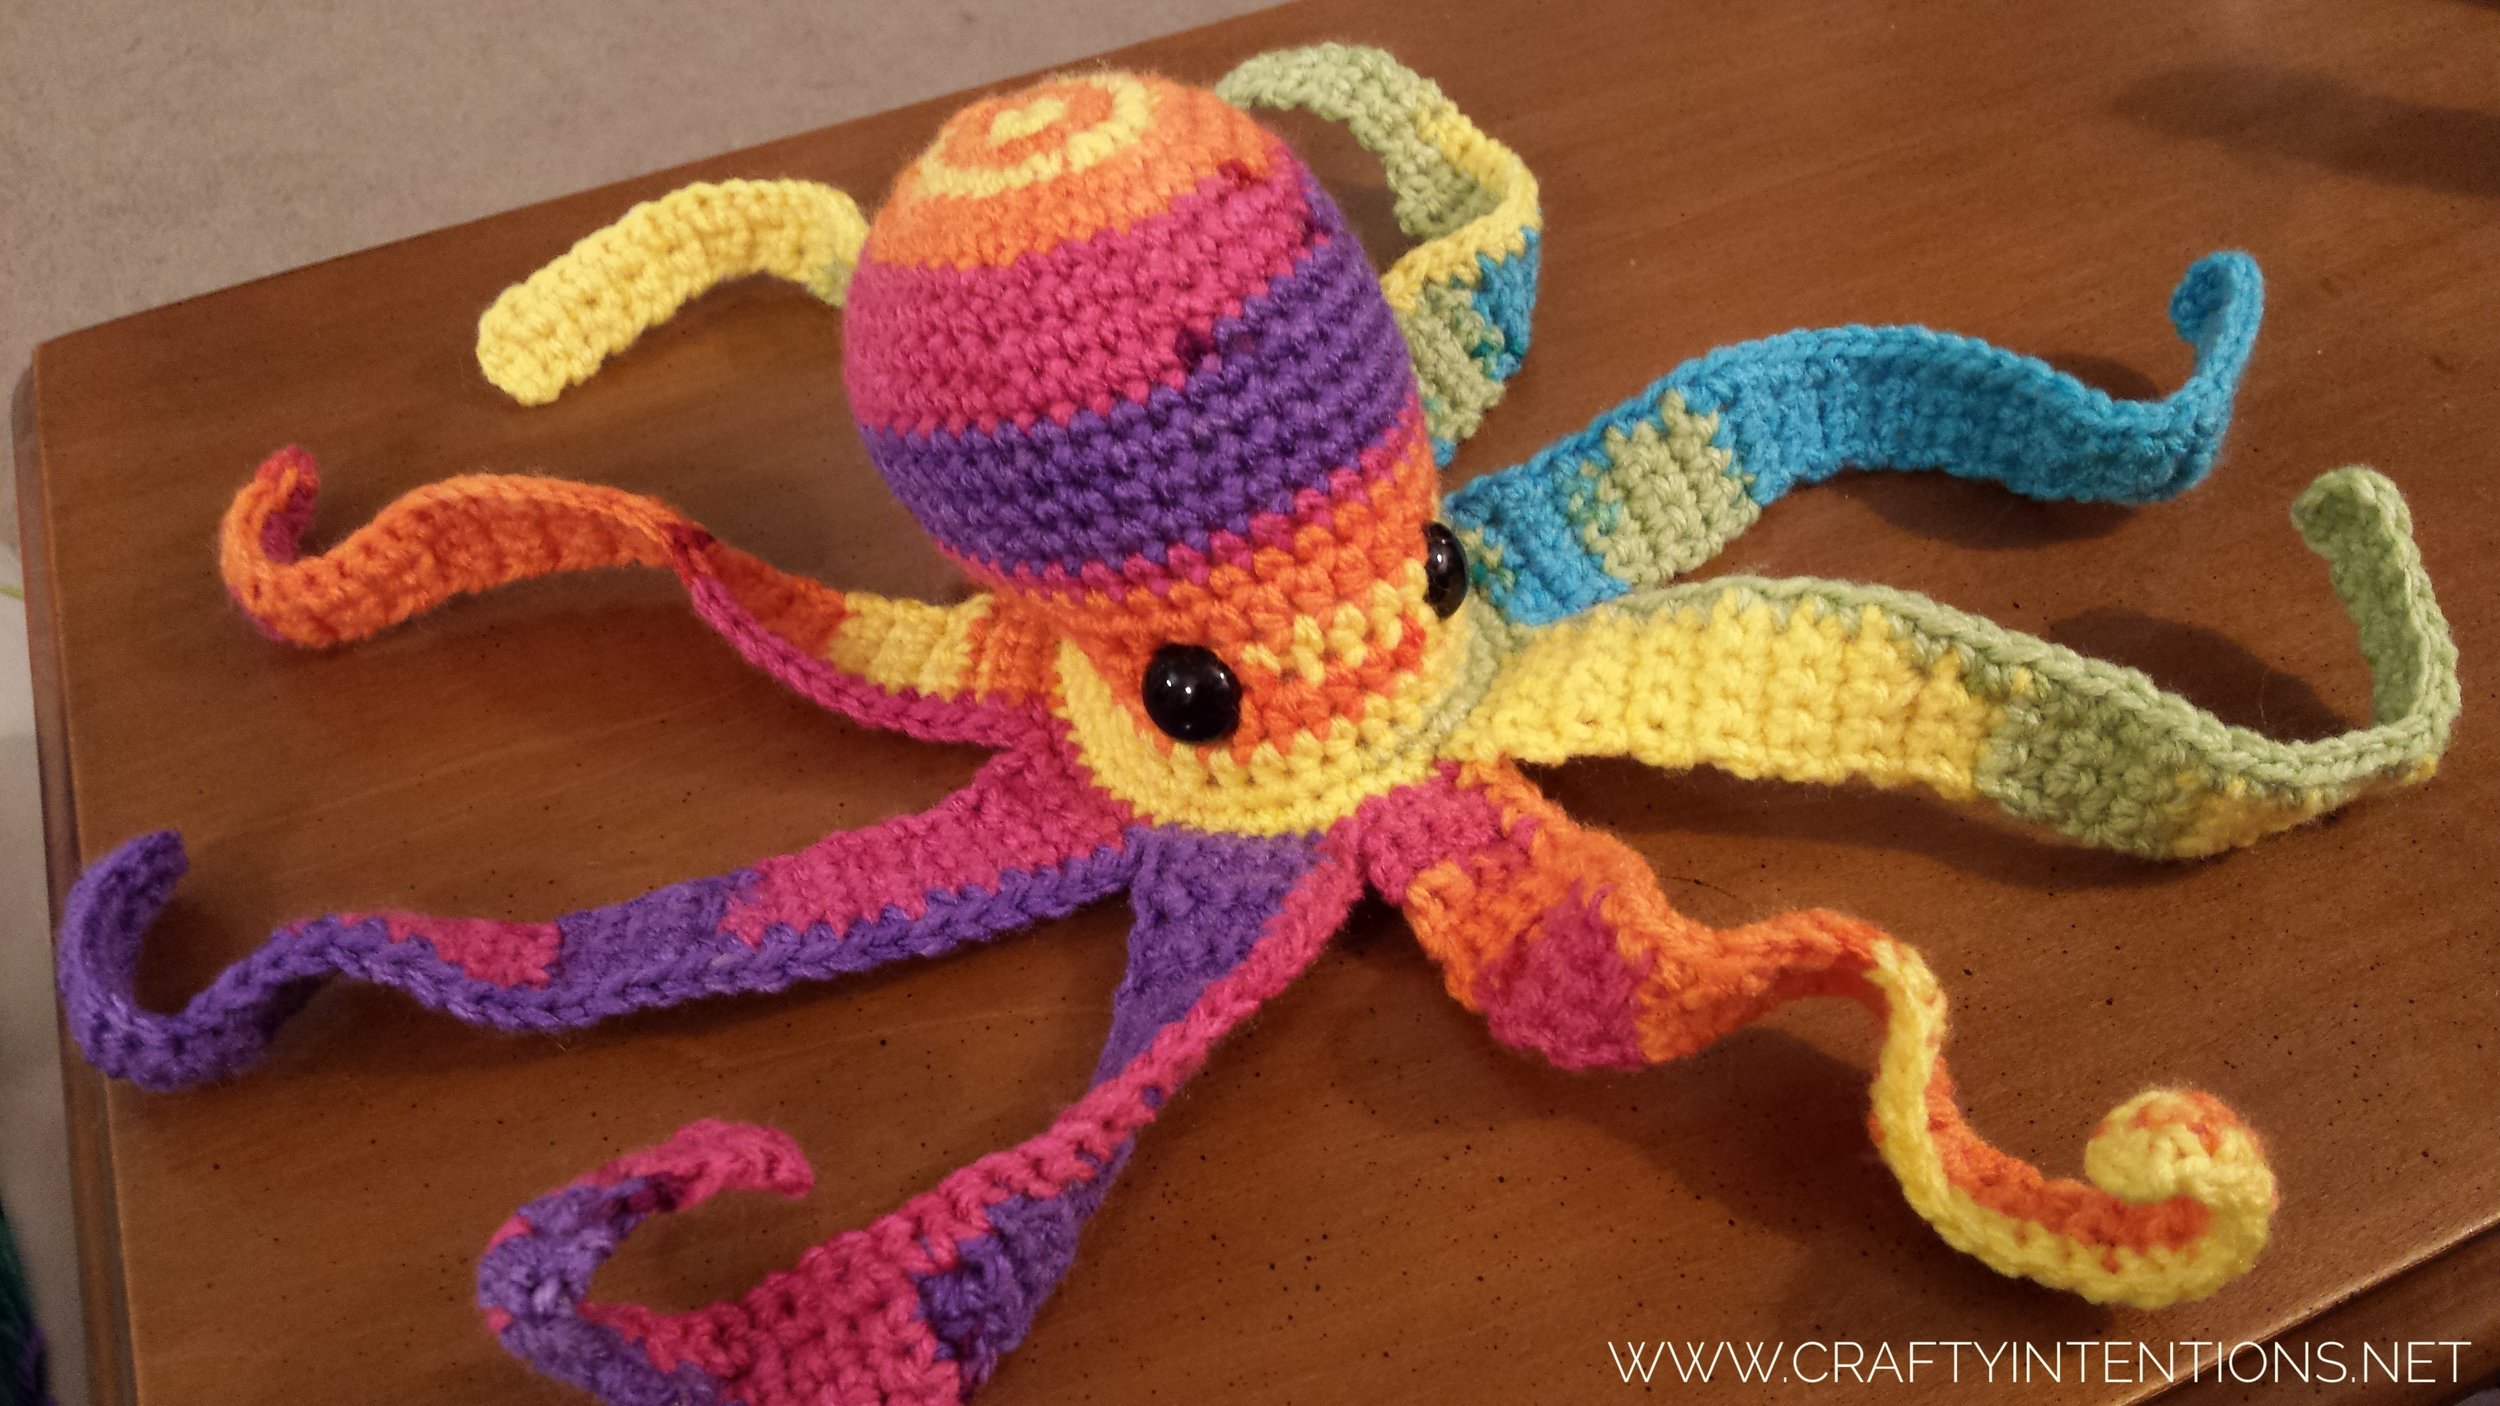
  For a while I dabbled in snap bracelet pin cushions.  I wanted the active seamstress to be able to wear a stylish... Octopus?... on her wrist and stab it as often as she liked.   It was a good idea, but in practice it's quite bulky.  It takes up too much space, and doesn't stay oriented on the wrist.  The snap bracelet itself (that I encased in blue felt above) wasn't quite strong enough, so in the end, it was a fail and a one-off.   I did try again with a Rainbow snap bracelet.  I made a separate arched felt rainbow that was pulled straight when you wore it as a bracelet, but arched into the air between two clouds at either end of the snap bracelet when it was straight... But it had the same issues.  I would show you, but I can't even find a picture!

2009 Cupcake Pincushion.jpg

Cupcakes were my next attempt.  This was a better idea than terra cotta pots and cacti, because the silicone cups I used aren't breakable!  Win!... Ish!  Instead the issues I found were first that the glass beads I used for sprinkles aren't great when you're using it as a pincushion (they get in the way of the pins!, duh. Ugh.), and the glue I used to secure the cupcake into the silicone cup didn't hold.

2009 White Ice Cream Pincushion-01.jpeg

I started getting warmer with this one!  The Ice cream cone I glued into a wooden cone, and that worked great.  The Glue held, and the wood was not fragile.  Unfortunately, I made the same mistake with the glass beads getting in the way of pins.

2009 Bunny in the Hat Pincushion-01.jpeg

This was a small hat I found in a craft shop, that was just begging for a little white rabbit.  So I made it look like the rabbit was hiding in the hat and everything was so great!  The hat is not breakable, the glue held, and there was no interference for the pins.  However, I underestimated how disturbing it would feel to stab pins into the back of a helpless little magic hat rabbit.

2009 Eyeball Pincushion.jpg

Once I entered the world of disturbing, it was hard to turn back though.  This one was built on a recycled bottle cap weighted with pennies.  The beads get in the way, but it turned out well for what it is.  Very few people seem to enjoy it the way I do, unfortunately.

2009 Pumpkin with Eyeball Pincushion-01.jpeg

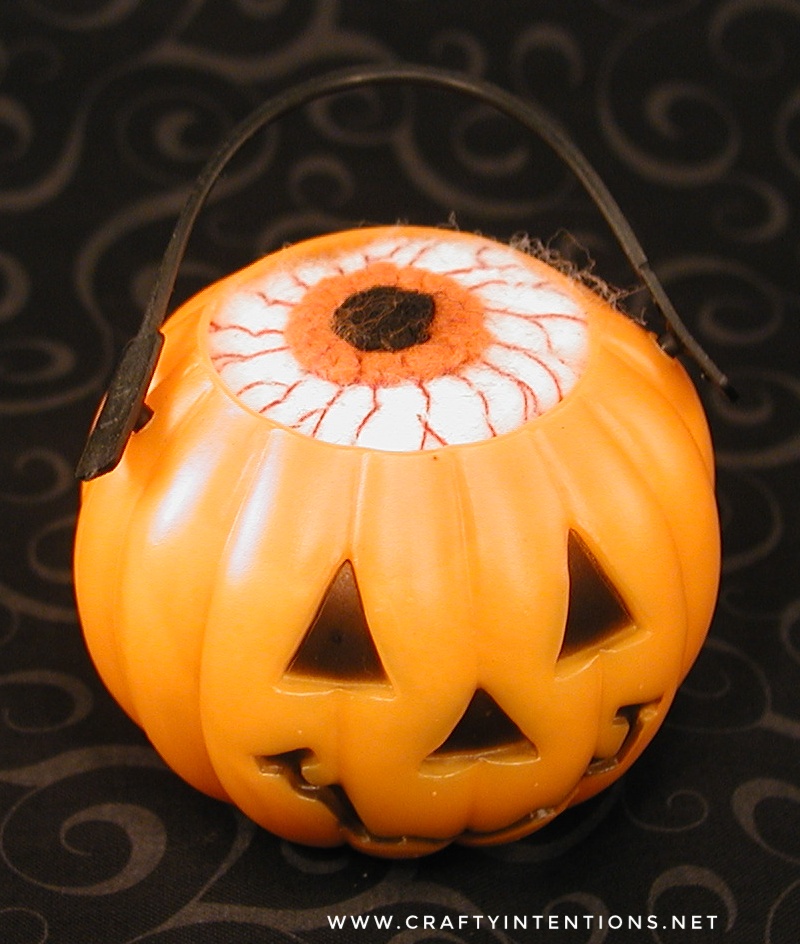
Have you ever seen these cheapy little plastic pumpkins?  I'm not sure what they're supposed to be fore, halloween party favors maybe??  But, I decided to try them for pin cushions!  MORE EYEBALLS.... Maybe?  Hmm, maybe not.

2009 Pumpkin with Brain Pincushion-01.jpeg

This one might be my favorite.  It worked up quickly - a little piece embroidered like a brain.  The glue held, the pumpkin isn't fragile...

And then I figured out that I prefer to keep my pins in a box.
Oh well.

tags: Felt, Hand Stitched, Hand Sewn, Sewn, Crafty, Crafty Intentions
categories: Sewing
Monday 11.12.18
Posted by Megan Lapp
 

Monster Pattern: Explained

This Monster Pattern is available on Ravely: https://www.ravelry.com/patterns/library/choose-your-own-adventure-monster

© 2018 Megan Lapp, Crafty Intentions™. All rights reserved. This pattern is FOR PERSONAL USE ONLY. The pattern (or parts of it) may not be reproduced, distributed or resold, translated, published, altered, shared or posted (for sale or free) over the internet or offline. You can sell items made from this pattern, provided they are handmade by yourself in a limited number and you give credit to the designer. Please add the following lines to your item description and any item you are selling: “This item is handmade by (your name) from a design and pattern by Megan Lapp, Crafty Intentions™”.

IMG_4746-01.jpeg

This pattern is for an Amigurumi-Style Choose-Your-Own-Adventure Adorable Monster. These Monsters have many interchangeable or combinable options to create over 64 different end-creations!! You can truly customize exactly what you want to make. There are Monsters with overbites or underbites, Monsters with legs and Monsters without legs, Monsters with dangly feet and Monsters with flat feet, Monsters with long or short arms, Monsters with horns or ears (or both!), Monsters with mohawks or spikes down their back, Monsters with eyebrows and/or claws, Monsters with as many teeth as you want in one of three styles!

IMG_4729-01.jpeg

Each step is photo-illustrated. Yarn amounts are extremely variable depending on what options you use. This project is an excellent stash buster for all sorts of smaller amounts of yarn you have on hand for all the different contrasting decorative bits you might choose to make.

IMG_4762-01.jpeg
tags: Crochet, Amigurumi, Monster, Original, Pattern, Crafty Intentions
categories: Patterns
Monday 11.05.18
Posted by Megan Lapp
 

Confessions in Winging it: Sorting Hat

20160914_094717-01.jpeg

This is another one where I did the thing, and ideally would like to be able to do it again.  So Why? Whyy?? Whyyy did I not write down what I did as I did it??

I think the real reason is that I always believe the first version is going to be terrible, so what's the point of writing it down.  And it doesn't always come out great, but it often comes out pretty-good but because of that nagging negative voice, I don't write anything down and then I always curse myself afterwards.

tags: Hat, Crochet, Sorting Hat, Hogwarts, Harry Potter, Crafty Intentions
categories: Hats, Crochet
Monday 10.29.18
Posted by Megan Lapp
 

Halloween Decorations: Windows Edition

In 2011 my family moved to a new house.  It was our first big move as a family, and days afterwards my baby had his first birthday.  It was a tumultuous time with a new job, new house, unpacking, no nearby family or friends.   It took a couple of months to unpack and by the time I did, I had a hefty supply of large cardboard boxes taking up an entire room of my house and the calendar had just ticked over to October.  Instead of getting rid of the boxes, I decided to recycle them into Halloween Decor.  All it took was some black paint, tissue paper, and a trusty box cutter.  My new house was uniquely suited to monster silhouettes because of all of the windows in the front.  I made a different one for each window, and taped them in place with duct tape.  

2011 - October - Allentown House of Megan Conway Lapp - Halloween Decorations (2)-01.jpeg

A friend of mine shared the photo and moving box story with this website I hadn't heard of at the time -- "Reddit".  And from there it went a little bit viral.  Every year since I've seen it re-shared and re-posted across the interwebs.

2011 - October - Allentown House of Megan Conway Lapp - Halloween Decorations-01.jpeg

Unfortunately cardboard moving boxes don't hold up over time.  We only lived in that house for 2 years.   When we moved we didn't take the old cardboard decorations with us.  In our new home, I decided to re-create the experiment but in a more permanently reusable medium: Wood.

20150926_222931-01.jpeg
IMG_7657 edited-01.jpeg

Now set-up each year is easy and our home immediately becomes a Monster Sanctuary each Halloween season.  Take-down is also easy, and they store away flat! 

IMG_7712 edited-01.jpeg
tags: Halloween, Monsters, Decorations, Holiday
categories: Halloween
Monday 10.15.18
Posted by Megan Lapp
 

Pegasus Pattern Published!!

The Crafty Intentions Pegasus Crochet Amigurumi Pattern is now available! You can find it here: https://www.ravelry.com/patterns/library/pegasus-5

Or Here: https://www.etsy.com/listing/635597418/digital-pegasus-crochet-amigurumi

© 2018 Megan Lapp, Crafty Intentions™. All rights reserved. This pattern is FOR PERSONAL USE ONLY. The pattern (or parts of it) may not be reproduced, distributed or resold, translated, published, altered, shared or posted (for sale or free) over the internet or offline. You can sell items made from this pattern, provided they are handmade by yourself in a limited number and you give credit to the designer. Please add the following lines to your item description and any item you are selling: “This item is handmade by (your name) from a design and pattern by Megan Lapp, Crafty Intentions™”.

IMG_0584-03 with Logo.jpg
tags: Pegasus, Pattern, Available, Amigurumi, Crochet, Magic, Flying Horse
categories: Crochet, Featured Pattern
Wednesday 10.10.18
Posted by Megan Lapp
 

Featured Pattern: Yoda hat

DSC_7504a-01.jpeg

Photo by Danielle Foster Creations: https://www.facebook.com/DanielleFosterCreations/
Hat made by me!
[Free] Pattern for the hat: https://www.ravelry.com/patterns/library/crochet-yoda-hat

This went well!  I enjoyed making this hat for this little new one.   It would be the perfect addition to a cute little onesie for a newborn's first Halloween! 

tags: Featured Pattern, Crochet, Hat, Yoda, Star Wars, Halloween, Baby, Crafty Intentions
categories: Featured Pattern
Monday 10.08.18
Posted by Megan Lapp
 

Halloween Costumes!

Since my children were born, I have done a new Halloween Costume every year and most have been handmade.  There have been rules and guidelines for these costumes that I follow.  1) They must be Cold-weather friendly.  2)They must match when I have more than one child.  3) I prefer book-related costumes.  This year they are finally making individual requests (She wants to be a Pink Cat,  He wants to be Max from Where the Wild Things Are - (Revisited, as you'll see below), Sigh), and I will no longer get to choose.  So to celebrate 8 years of Halloween Costumes done my way, I would like to share those costumes with you!

Year 1: Astronaut [Bonus costume!  First Ever!]

Hand-assembled... Yes, I put my precious baby's head on a plate in service of looking like an astronaut.  I stand by my actions.

2010 - Astronaut.JPG


Teddy Bear [Official Halloween]

Store bought, hand-altered.

2010 - Teddy Bear 1-01.jpeg

Year 2: Monster [Official Halloween]

Hand made all the way!  ... Mostly by my mom.  Though I did  do the adult hoodie decorations myself.

2011 - Monster-01.jpeg

Year 3: Max, Where the Wild Things Are [Official Halloween]

I store bought the one-piece pajamas.  I hand-made all the detail (added the feet/paws, buttons, ears and tail.  Made the crown with fur edging)

2012 - Max-011.jpeg

Skeletons [BONUS Costume! aka My Daughter's first costume!]

Pajamas with skeletons from Carters, Shirt for me with Skeletons from Etsy

2012 - Skeletons-02.jpeg

Year 4:  The Very Hungry Caterpillar and The Very Beautiful Butterfly [Official Halloween]

The Hungry Caterpillar handmade from fleece as a slip on costume (sandwich board style) over top green pajamas.

2013 - Hungry Caterpillar-01.jpeg

The Very Beautiful Butterfly with a store bought Orange sweatshirt and handmade butterfly wings from fleece.

2013 - Beautiful Butterfly 2-01.jpeg

Year 5:  Sorcerer's Apprentice & Minnie Mouse [Official Halloween]

Sorcerer's Apprentice Mickey was cheapy knit winter gloves and a golden rope I found at a craft thrift store.  My Mom made the hat, I added the ears.  I sewed the red robes!

2014 - Sorcerer's Apprentice 2-01.jpeg

Minnie Mouse was a machine stitched Red white-polka-dot dress from a pattern on Etsy with lots of petticoat material and lace underneath, over a black long sleeved t-shirt and leggings.  I made the ears from felt and bows attached to hair clips!

2014 - Minnie 3-01.jpeg

Bonus Costume!  I was particularly ambitious this year and made homemade costumes for the Renaissance Fair for both kids! 
Flynn Rider utilized leggings, a white button down shirt, this free pattern for boot covers using microsuede material, and a Flynn Rider vest of my own making!

2014 - Renaissance Prince 1-01.jpeg

Renaissance Fair princess was made using the same pattern as the Minnie Mouse dress, just with some alterations for the over-lay!

2014 - Renaissance Princess 2-01.jpeg

Year 6: The Cat in the Hat and Fox in Socks [Official Halloween]

Both costumes used store-bought solid-color one-piece pajamas.  The fox in socks used 2 pairs of blue soccer socks, and handmade ears and tail.  The Cat in the Hat costume used a store-bought hat and gloves and handmade belly and tie.

2015 - Cat in the Hat and Fox in Socks-01.jpeg

Year 7: Superman and Wonder Woman [Official Halloween]

Superman was store bought 100%.  Wonder Woman was partially store bought, and partially handmade.  I added glow in the dark stars, I altered store bought accessories to fit her. 

2016 - Superman and Wonder Woman-01.jpeg

Year 8: Peter Pan and Winter Tinkerbell [Official Halloween]

Peter Pan was store bought.  Tinkerbell was almost all handmade!  I bought a hair-bun, as we had cut her hair short, and I bought green boot covers.  I found light-up fairy wings at a yard sale.  The Dress was made from an adult sweatshirt, and extra large pipe cleaners.  Brown accents are lengths of elastic!

2017 - Peter Pan and Tinker bell-01.jpeg
2017 - Tinkerbell-01.jpeg
2017 - Peter Pan and Tinker bell 2-01.jpeg
tags: Halloween, Costumes, Sewing, Handmade, Crafty Intentions, Where the Wild Things are, Minnie Mouse, Mickey Mouse, Princess, Sorcerers Apprentice, Teddy Bear, Skeletons, Monsters, Hungry Caterpillar, Butterfly, Wonder Woman, Superman, Fox in Socks, Cat in the Hat, Tinkerbell, Peter Pan
categories: Sewing
Monday 10.01.18
Posted by Megan Lapp
 

Crafty Intentions: Failed Results, Part 4: Felt Thingys

Why did I make this?

2551438478_698c9796c8_o-01.jpeg

I sure don't know.  It took A LOT of hand stitching.
Why.

tags: Fail, Felt, Sewn, Hand Stitched, Abstract, Crafty Intentions
categories: Fail
Monday 09.24.18
Posted by Megan Lapp
 

Tumble Leaf Rumble Leaf

My son is a huge fan of the Amazon Prime show Tumble leaf.  Since written communication is easier for him, he really likes that they show the word for the thing Fig finds in the Finding Place at the beginning of each episode, and then there's an entertaining story about exploring that found thing.  I decided to make him a Fig so that he could maybe play pretend with his favorite TV buddy.  I actually wasn't sure how much he'd like it, but since he liked the show so much it was worth it to me to try.

2014 Amazon Tumble Leaf Fig Doll-01.jpeg

I used old jeans for Fig's pants, brown fleece for his tshirt, and left over furry material from a previous Halloween costume for his ears and skin and feet.  Fig accidentally ended up being nearly as big as my son!

10393842_822771063197_205910862877825881_n-01.jpeg

Fig is well-loved!

tags: Fig, Tumble Leaf, Amazon Prime, Crafty Intentions, Sewn
categories: Toy
Monday 09.17.18
Posted by Megan Lapp
 

Featured pattern: Koi Fish

Rainbow Fish10-01.jpeg

This Rainbow Fish made by Me! Crafty Intentions.
Pattern by: Terry Finer
Pattern Link: https://www.ravelry.com/patterns/library/whomsoevers-koi-fish

A few pieces and parts of this fish can be tricky, and it is definitely a large fish!! But the finished product is so satisfyingly gorgeous that I have to recommend the pattern.
 

Rainbow Fish7-01.jpeg
tags: Fish, Koi, Yarn, Amigurumi, Featured Pattern, Crafty iNtentions, Crochet
categories: Amigurumi, Featured Pattern
Monday 09.10.18
Posted by Megan Lapp
 

Question: Fox pattern, Yes or No??

IMG_9913-01.jpeg

Fox pattern! Now, I didn't just wing this. I did write it down.  But... Is it good enough to publish it?  Would you want to make one like this? I'm undecided about whether or not it's worth actually typing up, testing, and publishing. Hmm...

Silver Fox $25 (3).JPG
tags: Fox, Crochet, Amigurumi, Pattern, Crafty Intentions
categories: Amigurumi
Monday 09.03.18
Posted by Megan Lapp
 

Confessions in Winging it: Jake and Lady Rainicorn

I have a bad habit, every once in a while, of making a thing, and not writing down what I did so that I can make the thing a second time.  This is one of those times.

2013 Jake the Dog and Lady Rainicorn Crochet Hats-02.jpeg

After binge watching most of Adventure Time, I decided to make a Jake and Lady Rainicorn hat for some loved ones.  They do not watch Adventure Time.  Make note: Attempt to make gifts referencing pop culture only for people who are familiar with said pop culture.   I'm very proud of how they came out, and I would happily share the pattern with you but...

I winged it.

tags: Winging it, Crochet, Amigurumi, Hats, Adventure Time, Jake, Lady Rainicorn
categories: Hats
Monday 08.27.18
Posted by Megan Lapp
 

Featured Pattern: Flumplebees!

This is a pattern by EssHaych!
You can find it here: https://www.ravelry.com/patterns/library/the-flumplebees

IMG_4828-01.jpeg

It's worth a couple of dollars for sure!  It's a short simple pattern, easily made, beginner level, very cute, and it creates an adorable, very imaginative creature!  I can use just about any imaginably solid or variegated yarn for this one. At my last craft market, I sold out of these little guys.  Every single person who asked about them was delighted by the name "Flumplebee" and insisted on taking one (or three) Home!

Now, I made a few alterations to my construction.  I add a wire in the body that reaches all the way from the nose to the butt so that you can re-position the head and neck.  I also add some glass gems at the bottom of the butt to weigh it down and make it sit securely (but both of these things can be completely left out to make the thing 100% toddler safe).  I like sizing up the eyes a little bigger than what they recommend in the pattern, but that's just personal preference. I also sometimes piece in a mane of yarn and it makes them look like wayward fuzzy flowers to me! 

30848448_1659189784172042_4238109530911915495_o-01.jpeg
tags: Flumplebee, Crochet, Amigurumi, Crafty Intentions
categories: Featured Pattern
Monday 08.20.18
Posted by Megan Lapp
 

Autism and Crafting

So, my now (today!!) 8 year old son is Autistic.  He has a significant communication delay and has difficulty with verbal interaction.  He has had early intervention since he was 2, has been in ABA preschool from 3-5, and special education classrooms from 5 years old onward.  He has a PCA (an adult with him at all times in school to keep him safe, and focused on his work).  Specifically he's what's called "Hyperlexic" which means he's been able to read since he was 2, but he has difficulty with spontaneous verbal communication.  He's been obsessed with letters and numbers from a very, very early age.

He is a lot of work, but I also feel quite lucky.  I know everybody says something like that, but I'm not trying to be all rainbows and sunshine.  He is quite affectionate and sweet.  His heart breaks when kids get upset nearby him -  he can't tolerate tears or sadness.  He's gentle with animals and smart as a whip.  He's enthusiastic about playing and fun, and absolutely loves music (he has Hamilton memorized).   There are moments, even days or weeks, when it is difficult to connect with him... but for the most part, that's easy.

When I make gifts for him, I try especially hard to make sure it's going to be something that really makes him light up. 

2013 Alphabet Blanket.JPG

Here's the pattern I used for this one: https://www.ravelry.com/patterns/library/babys-abcs-afghan

It worked great!  He was finally able to literally wrap himself up in the alphabet, and roll around on top of it.  He traced those letters all day and gave me a big hug for this one.  This was a total success!!

tags: Crochet, Blanket, Alphabet, Autism
categories: Blankets
Monday 08.13.18
Posted by Megan Lapp
 

Baby Quilts

I have found crib-size quilts the easiest quilts to make.  They are just big enough to enjoy a design or have fun with putting together a color scheme... maybe even experiment with some new quilting designs... But they are not big enough that they become over-burdensome.  Also, newborn babies are SUPER easy going about gifts.  Even if you make a mistake, they will NEVER mention it... mostly because they won't be able to talk for a few years.

2015 Baby Blue Bird Crib Quilt-01.jpeg
2015 Baby Pink Crib Quilt-01.jpeg
Satisfied customer.

Satisfied customer.


Monday 08.06.18
Posted by Megan Lapp
 

Crafty Intentions: Failed Results, Part 3: Lace Skirts

Skirt FIVE2-01.jpeg

So, there was an extended period of time when I couldn't stop adding lace to tiered skirts.  By hand, pre-sewing machine.

Skirt THREE1-01.jpeg

They were all (thrift)store bought skirts.  I was so sure I would wear them all the time, but it turns out that my office job didn't think these were very "Office-Appropriate" and they ended up taking up a lot of poofy unnecessary room in my closet. 

Skirt FOUR1-01.jpeg

It still took me about 10 years to officially re-home them to a local craft re-use store in hopes that a more adventurous soul would wear them regularly and give them the love they deserve.

Temporary PHotos 024-01.jpeg

I didn't wear them often, but when I did I sure felt fancy.  It's too bad I didn't get more use out of them.  Also sewing all that lace on with tiny hand stitches took FOREVER. I enjoyed it, and it certainly led me to feeling confident enough to attempt to begin my rainbow king sized quilt, which is what led to me getting a sewing machine... But I'm sad this wasn't a craft that made something I really used.

tags: Lace, Skirts, Hand Sewn, Hand Stitched, Crafty Intentions
categories: Fail
Monday 07.30.18
Posted by Megan Lapp
 

Octopus Pattern EXPLAINED

The Crafty Intentions Octopus pattern is available on both Etsy and Ravelry.  It is one 7 page pattern in English using American Crochet terms.   It features instructions on how to make a simple floppy Octopus and also a complex Octopus complete with suckers.

20170330_215342-01.jpeg

The simple octopus (As pictured above) is crocheted in one piece.  You add safety eyes, stuff the head and crochet a disc and sew that on the bottom of the octopus to seal in the stuffing.  This is a very quick piece and is perfect for easy toys to sell at craft fairs or a simple gift for a kid.  Felt on the eyes to make it toddler-friendly.

20170402_233023-01.jpeg

The complex octopus (as pictured above) is crocheted in two solid pieces, which are then crocheted together around the entire edge using single crochets.  The body of the octopus can be as firmly stuffed as you want.  This takes longer than the simple octopus, but achieves a nice realistic look with the suckers/bobble stitches!

© 2017 Megan Lapp, Crafty Intentions™. All rights reserved. This pattern is FOR PERSONAL USE ONLY. The pattern (or parts of it) may not be reproduced, distributed or resold, translated, published, altered, shared or posted (for sale or free) over the internet or offline. You can sell items made from this pattern, provided they are handmade by yourself in a limited number and you give credit to the designer. Please add the following lines to your item description and any item you are selling: “This item is handmade by (your name) from a design and pattern by Megan Lapp, Crafty Intentions™”.

tags: Octopus, Pattern, Crafty Intentions
categories: Patterns
Monday 07.23.18
Posted by Megan Lapp
 

Mermaid Unicorn Inspiration

rome_lazio_italy_fontana_trevi_fontana_di_trevi_capital_roma_capitale-671379.jpg!d.jpg

The idea to invent a crochet pattern for a Mermaid-Unicorn Hybrid creature was inspired by many different sources, first and foremost was the mythology of the Hippocampus.  Greek and Roman myths have always been fascinating for me, so seeing the Merhorses depicted at the Trevi Fountain was a vivid memory.

Inspiration Unicorn Mermaid.png

Another source of inspiration was the carousel horses from the fantastic hand carved carousel at Fantasy Island in LBI, NJ.  My family would visit LBI every year as a child, and I had one carousel horse that I was very particularly loyal to, and my brother had a favorite as well.  I would ride the one adorned with roses, he would ride the dragon.  Looking back, the dragon was VERY Merhorse-ish. 

And once I started Looking, I found a tremendous amount of inspiration on Deviant Art.
I'm so glad I did, because I'm really quite proud of how the pattern turned out and I absolutely love seeing everyone's unique versions!

Go Here for more: https://nambroth.deviantart.com/art/Hippocampus-22624615

Go Here for more: https://nambroth.deviantart.com/art/Hippocampus-22624615

tags: Mermaid, Unicorn, Hippocampus, Crafty Intentions, Inspiration
categories: Patterns
Monday 07.16.18
Posted by Megan Lapp
 

Crafty Intentions: Early Days

2006 - April - Megan Conway (Lapp)'s senior Art exhibition at Lafayette College (1)-01.jpeg

I've been making things and creating things as long as I can remember.  It took me until years past college to find fiber arts.  Here's a (slightly embarrassing?) glimpse of my college Honors Thesis.  Looking back, I wish I had gone further with it.  I wish I had made hundreds of casts, instead of a couple dozen.  I wish I had painted some of them instead of leaving them all white.  I wish I had really focused on making them GROW from each other and from the wall.... But, I still graduated with honors.  It was certainly a special project to me.  Go Lafayette! Go Pards!

2006 - April - Megan Conway (Lapp)'s senior Art exhibition at Lafayette College (2)-01.jpeg
tags: Fine Art, Sculptures, Plaster, Crafty Intentions
categories: Sculpture
Monday 07.09.18
Posted by Megan Lapp
 

Crafty Intentions: Failed Results, Part 2: Cupcake Icing Caulk

At some point I developed a burning desire to make cupcakes.  Not real cupcakes, mind you.   I do not cook or bake.  Fake cupcakes.  Fake, perfect looking cupcakes.   First, I needed to figure out how to create perfectly little whipped icing spirals.  How do you do that?

Maybe by piping three dimensional paint in an icing bag through a fancy tip?

New Pictures 043.jpg

No, that's not it.  They came out yellowed and pock-marked.
What about spackle? Would that come out whiter? Fluffier?

New Pictures 046.jpg

Decidedly not.
How about Modelling paste? (Also a construction-type material)

New Pictures 012.jpg

Success-ish? Achieved the whipped cream white-color.  Fail on the texture.  They turned out brittle and hard and very matte.  I wanted a shiny delicious look.  This was not it.

New Pictures 027.jpg

I ended up doubling down and piping a whole truckload of modelling paste into tiny cupcake foils.  For what purpose? Mmm, hard to say.  Somewhere there is a whole box of these guys just tucked away for a rainy day in my house.  Definitely a journey that could have ended a whole lot sooner than it did.  

tags: failed, cupcakes, icing, caulk, crafty intentions, failed results
categories: Fail
Monday 07.02.18
Posted by Megan Lapp
 
Newer / Older

Powered by Squarespace.